Subject: Return of Rustpuppy report 96
Date: Wednesday,
February 14, 2001 5:57 PM
Had a
bad week but pressed on with the Nova work regardless..
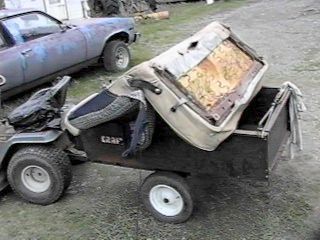
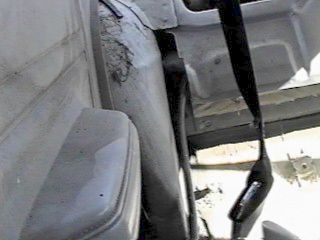
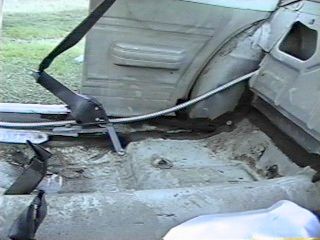
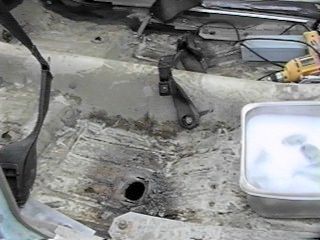
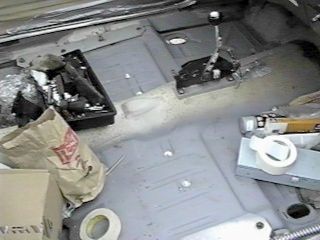
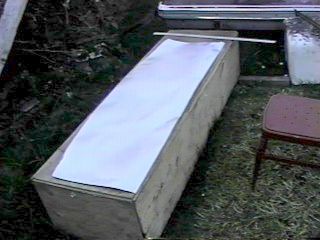
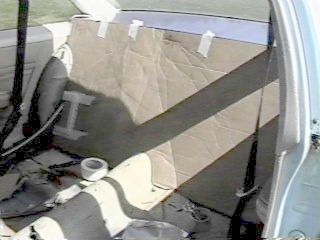
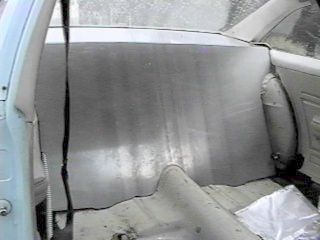
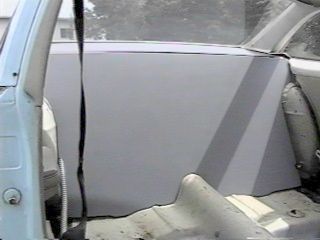
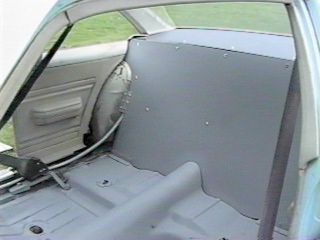
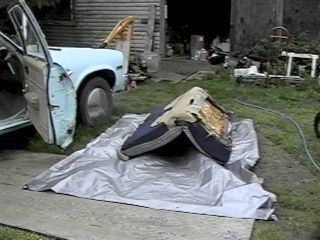
The
first order of business was to get the seat out of ol’ Rustpuppy. Since I have the mounts modified (moved
back about 7.5”) and the shifter locking the position of the seat from moving
forward on the slides getting the two rear bolts out involved a bit of
acrobatic standing on head in back seat while scratching around under the seat
with wrenches. But eventually
skill and science prevailed and the seat was out.. (ror96-1.jpg and ror96-2.jpg)
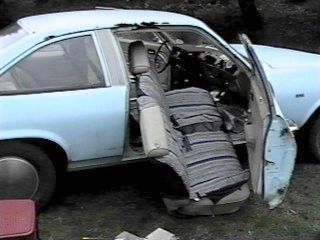
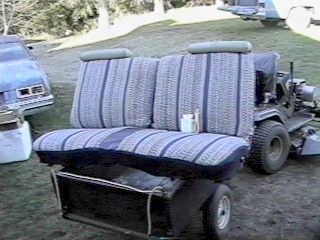
The seat
assembly weighs 84 lbs.. More than
I thought..
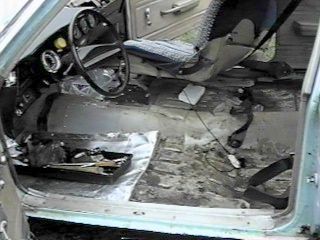
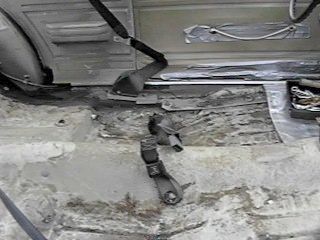
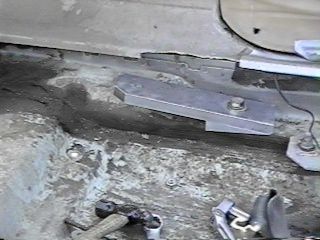
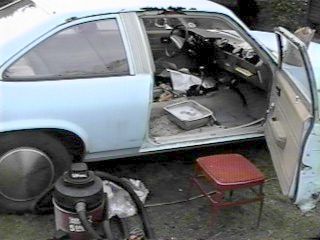
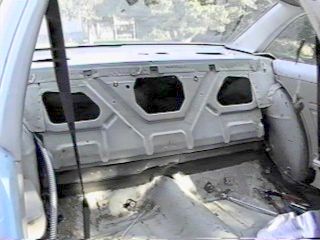
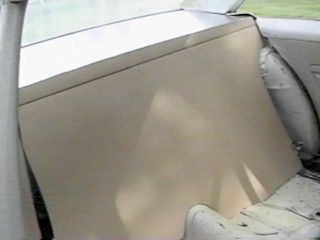
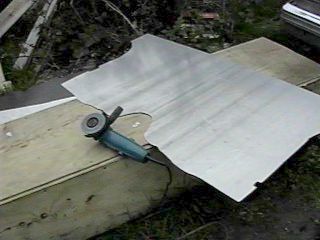
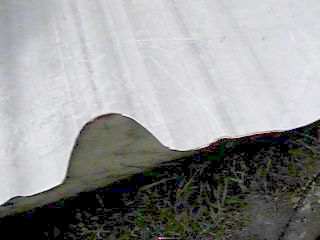
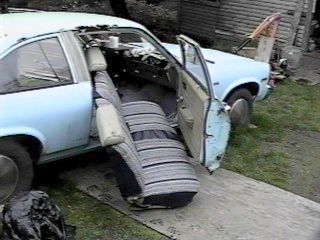
The
nasty looking grot all about on the floor is mostly just dirt built up over the
last 8 years.. (and a bit of
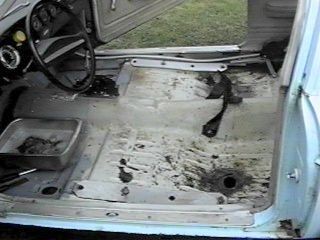
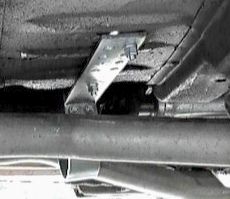
surface rust..) Ror96-3.jpg
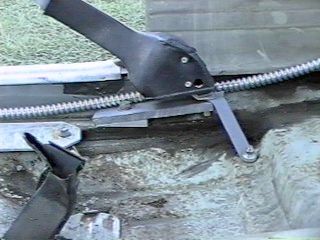
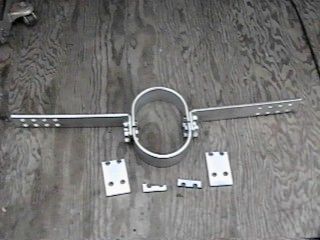
shows the brackets which allow the seat to go back far enough to fit my long
fat ol’ legs..
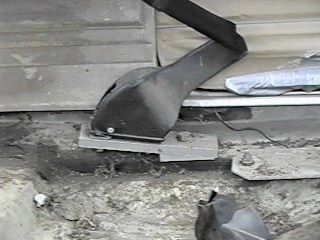
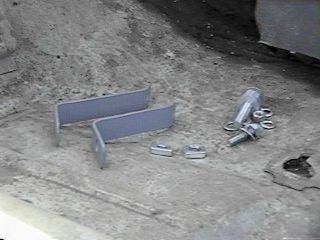
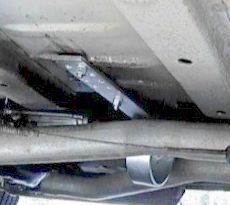
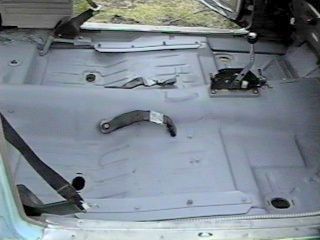
Ror96-4.jpg and ror96-5.jpg show the special alloy
brackets I made back in 1993 to move the seat belt reels back so they can be
used properly with seat so far back..
I have never been happy with these brackets as they really require a
second mounting point to prevent them bending the floor and pulling up in case
of a serious crash. Having
the seat out allows this omission to be corrected..
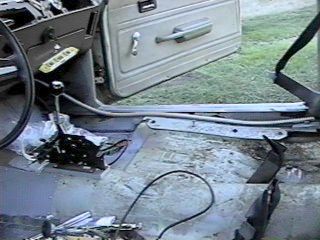
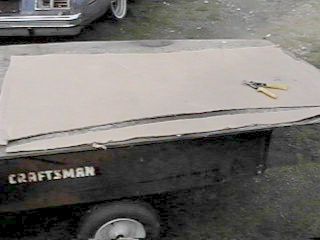
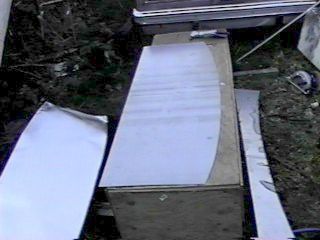
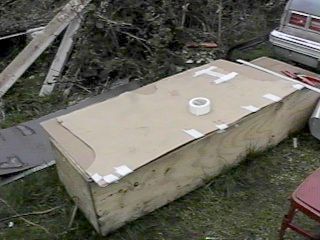
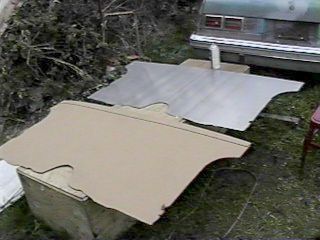
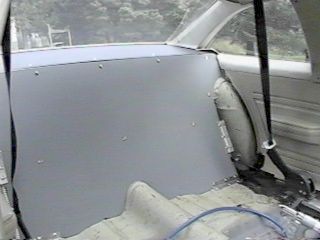
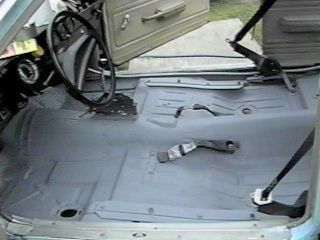
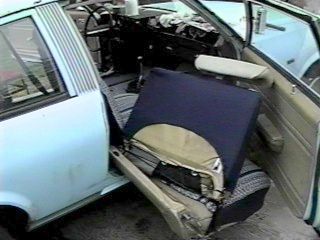
The next
picture shows the seat out and ready to be properly hog-ringed up to put the
seat covers from Whitney on correctly.
(ror96-6.jpg)
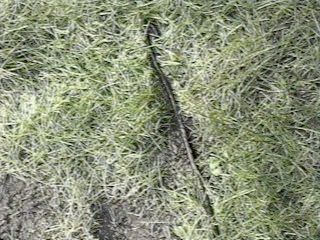
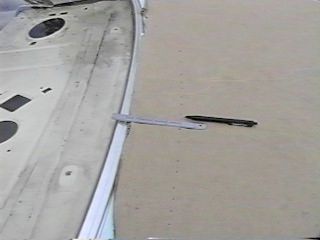
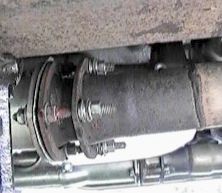
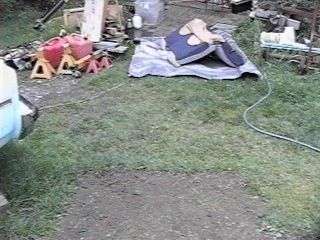
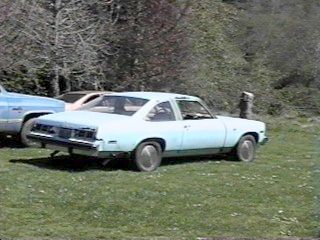
Remember
back when I was doing the rear axle swap and I was bitching cause I lost track
of the metal bar used by GM to hold the right rear emergency brake cable in the
right position? Well it
showed up imbedded in the lawn right where I dropped it. The picture was taking after it was
moved so it is quite visible.
Before it was just barely peeking out of the grass.. I cleaned up the rust and gave it a
couple coats of the self-etching primer..
Looking much better..
(ror96-7.jpg and ror96-8.jpg)
More to
come..
Rick
Draganowski
Subject: Return of Rustpuppy report 97
Date: Friday,
February 16, 2001 5:32 PM
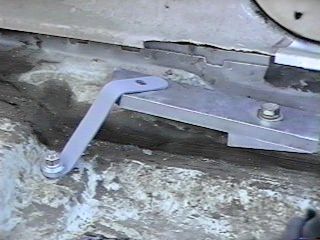
As I
mentioned in ror96 the brackets, which mount the seat belt reels, were not good
enough. I attacked this issue
first.
First I
scratched around under the car looking for a good place to mount a rear
brace. There was a clear space in
the reinforcing plate, which mounts the spring bracket on each side so a 3/8”
hole appeared in them. It
would take a lot to pull through there.
Then I
pulled the brackets, cleaned them up and milled the corners off to allow a
clear shot for the rear braces.
(ror97-1.jpg) You can see
the hole in the floor in this pic.
Then I burst into a frenzy of cutting, grinding, drilling,
and hammering to fabricate two rear braces. They are 1/8” by 1” steel with a nice coat of the self
etching primer.. Ror97-3.jpg shows
the drivers side brace in position..
Then I
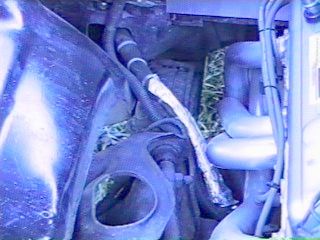
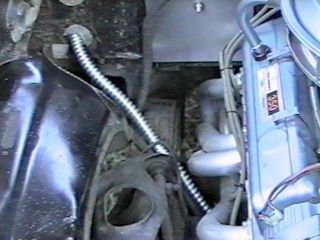
wanted to do something about the naked battery cable running through Rustpuppy.
(which is live all the time and not really too safe) The front is threaded through a piece of conduit in the hole
in the floor to protect it from the edges of the hole. (ror97-4.jpg)
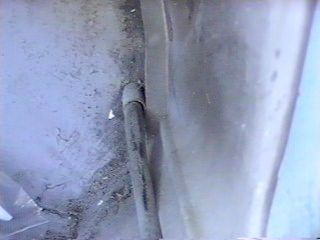
The rear just leaks in through one of the big holes
leading to the trunk. (ror97-5.jpg)
NHRA does not like these big holes I understand..
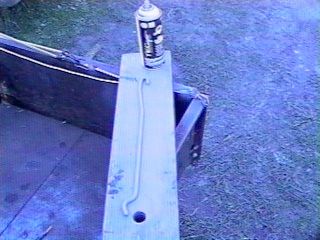
My
solution for the battery cable is based on a piece of ½” flexible conduit. (called it BX cable when I was a kid
workin with my Dad..) Currently the battery cable was protected under the hood
with a piece of split heater hose and some aluminum tape.. (ror97-7.jpg)
After
drilling out a 1” hole in the firewall I removed the battery terminal (breaking
it) and threaded the cable through the flexible conduit. Easier said than done as it took a lot
of fooling around and all my strength to slide it through there by pushing..
Ror97-8.jpg,
ror97-10,jpg, ror97-11.jpg, and ror97-12.jpg show the new improved battery
cable system.. Looks good to
me.. You can see the broken
terminal in ror97-9.jpg.. I
had a spare hangin on the shop wall because I know these cheapies are one-shot
jobs..

Next I
will be cleaning up the interior and doing something about them big trunk
holes..
More to
come..
Rick
Draganowski
Subject: Return of Rustpuppy report 98
Date: Tuesday,
February 20, 2001 3:12 PM
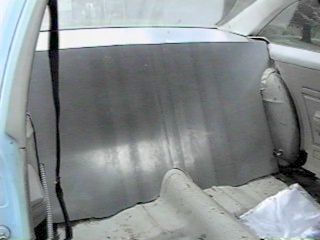
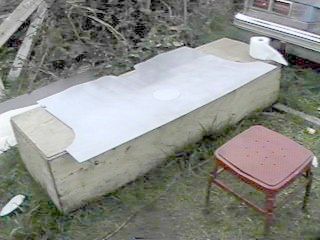
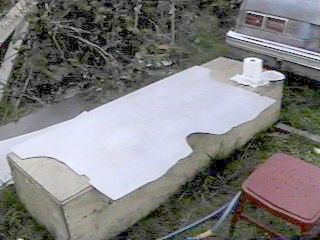
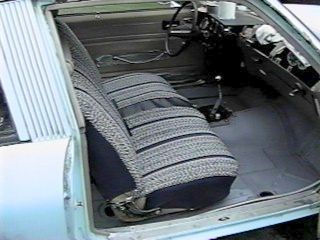
First I
have a shot of the JCWhitney saddle blanket seat cover I hog ringed on to
Rustpuppy’s tattered ol’ bench seat.
It is nice and the only cheesy part is the stupid vinyl piece in the
middle. What exactly is that
for? (ror98-1.jpg)
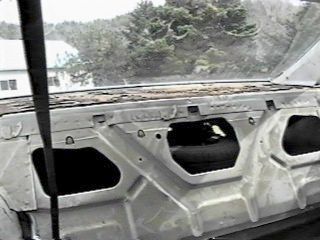
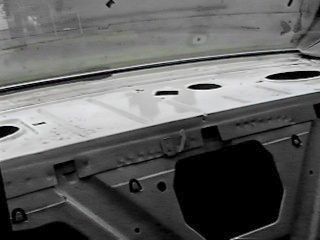
The cleanup
work on the interior started with soap and water. (ror98-2.jpg) You can see that it needs it.. (ror98-3.jpg)
After a while
and a lot of scrubbing it started looking much better. The original white paint is still
mostly there.. (ror98-4.jpg)
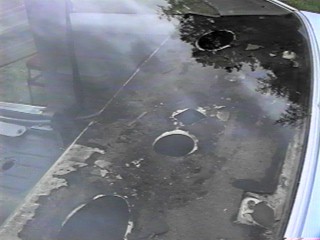
Then I
crawled into ol’ rustpuppy and attacked the masonite cover for the package
shelf. I started out in a rational
way but after a while I was tearing at the aged and brittle as glass masonite
like an animal. I got a snoot full
of nasty dust from the decayed soundproofing mat under the rapidly fragmenting
cover. ( made me sick for the
evening) Finally the masonite was
all gone and the ugly mat exposed.
(ror98-5.jpg and ror98-6.jpg)
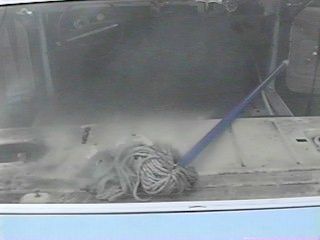
I got out
the heavy duty shop vacuum and removed the mat in tiny fragments. It was falling to bits and could not be
moved any other way. Then I
cleaned up the bulk of the really nasty residue with a mop so I could do it
without climbing inside. After
mopping up 90 percent of the residue I painfully climbed in and finished the
job by hand. It is looking pretty
good back there now.. (ror98-8.jpg)
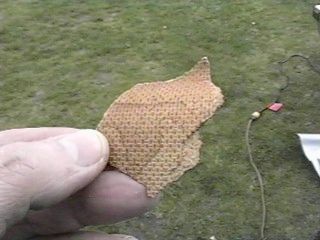
I only
saved one little fragment of the torn apart masonite package tray cover to show
you.. (Ror98-9.jpg)
Rick
Draganowski
(tearing at
old cars like an animal)
Subject: Return of Rustpuppy report 99
Date: Tuesday,
February 20, 2001 6:59 PM
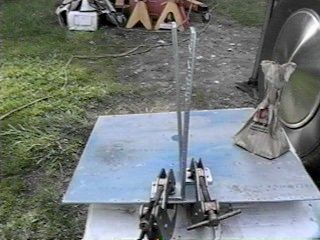
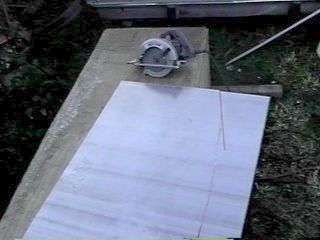
Now that
the interior is clean it is time to do stuff with steel. I plan on making a sealed steel
firewall between the passenger compartment and the trunk. Partly because that is the rules but
mostly because I want the exhaust fumes which come in through all of the rust
holes in Rustpuppy’s cosmetically challenged body to stop gassing me.
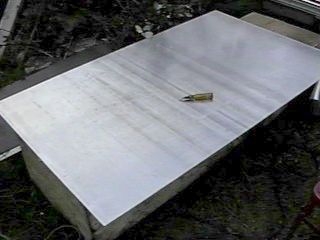
Ror99-1.jpg
is the starting point. About 50
bucks worth of 28 gauge by 20 inches by 30 feet steel valley flashing. Since I am at the end of the
world here I have to make do with what is available. 30
feet of the stuff should last me a long time.. (it is a particularly repellent poop brown in color..)
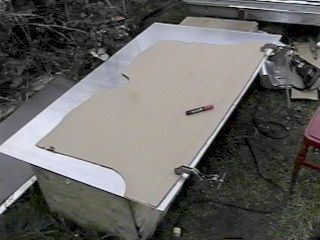
I start
on the package tray cover by laying out a cardboard master template on the
trunk lid. I am measuring 5 inches
in from where the steel should end inside. You can see the little marks if you look close.
Then after connecting the dots I cut out the
template. (ror99-3.jpg)
For fun
at this point I struggled with the steel to flatten out and cut off a
piece. It was a real Laurel and
Hardy moment as the coiled steel did not cooperate.. Eventually I won because I outweigh it by a lot.. (ror99-4.jpg)
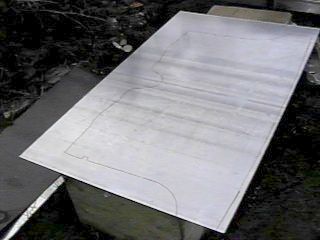
Back to
the template work. I took the
initial cut of the master template and put it back on the trunk for
verification at 2 inches.
Naturally it was a little screwed up. (about ¼” off on one side of the curve) (ror99-5.jpg)
After
trimming off the screwup I went ahead and made a check template from the master
template using come aluminum covered building paper. Easy to cut using a razor knife. (ror99-6.jpg)

Then I
struggled my fat ol’ bod into Rustpuppy with the check template and put it into
proper position..
(ror99-7.jpg)
Too
cool! It fit perfectly. Now if the weather will cooperate
(it has been raining buckets all day and probably will tomorrow too) I can use
the check template as a guide to cutting the brown steel. I can use my air driven sheet
metal nibbler to do the cutting so it should be fun and easy.
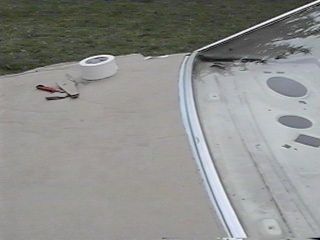
Went to
town in the rain today to pick up some more (3 rattle cans) of the self etching
gray primer. I plan on using it as
the interior motif.. Got some
battery cable stuff and terminals to use on the master cutoff switch too. It and the Lakewood driveshaft safety
loop are on the way from Jeg’s as I speak..
More to
come..
Rick
Draganowski
(rain, rain,
go away..)
Subject: Return of Rustpuppy report 100
Date: Sunday,
February 25, 2001 8:28 PM
After 5
days of 40 degree rain with wind the weather finally cleared up to make a
beautiful sunny day.
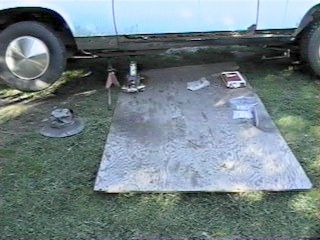
I
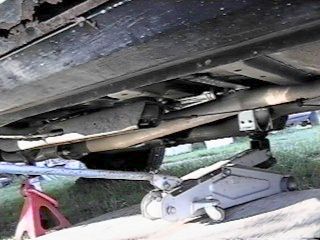
ordered the driveshaft safety loop from Jeg’s last week and it showed up on
Friday so today I started digging into the installation. First I got Rustpuppy up high enought
to crawl under and mess about.
The plywood is because the ground is still mighty soggy.. (ror100-1.jpg)
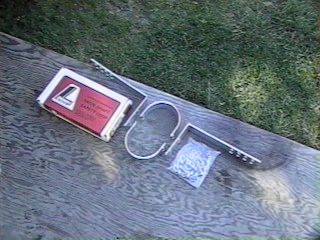
I set
the Lakewood loop parts out to take a look at. Something seems wrong with them.. More on this later..
(ror100-2.jpg)
A trial
fitting in the highest setting showed a clear lack of even coming close to
fitting. I have the jack holding
it up temporarily. It is
just too low on the bottom and too low on the top.. Bummer..
(ror100-3.jpg and ror100-4.jpg)
Ror100-5.jpg
shows the parts lined up at the highest setting possible with the Lakewood (
read, Chang Metalworks, Hunan Province, Peoples Republic of China) supplied
holes.
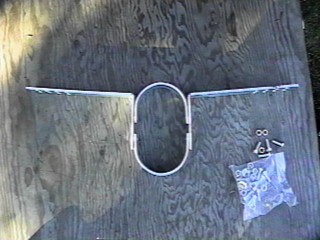
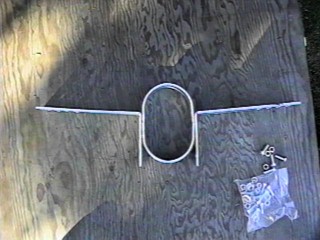
Ror100-6.jpg
shows what might work with some drilling and cutting. The lower loop would be shortened by about 1 inch from this
picture and the L-shaped tails trimmed off..
Ror100-7.jpg
is the Chinese version of the loop.
Notice that they drilled the multiple adjustment holes in the long arm
of the bar instead of the short one..
And there are holes missing from the loops. Somebody did not know what they were making and didn’t
know how to read the blueprint..
Bummer..
Ror100-8.jpg
is the actual design pictured on the Lakewood box. Notice the differences in the location of the holes..
Oh, well
I expected to have to modify it.
Just not this much..
Without changes it looks like it is set up for a 4 wheel drive monster
truck or something..
Hmm..
You don’t think that Jeg’s sent the truck kit by mistake?
I will
look into it tomorrow..
On
another front I wrestled with the stupid coiled up steel and decided that if I
was going to put a firewall in Rustpuppy it should have a structural purpose.
The steel was so bent up from being coiled tight that I couldn’t do nothing
with it. I took the balance of the
steel coil back and picked up a couple of sheets of 0.090 aluminum from one of
the local boatbuilders.
(ror100-9.jpg)
I will
be attaching it all the way around (inner fender wells, floor, and along the
top of the seat back area) to stiffen up the chassis. And the package tray will be structural as well.. I will cut the aluminum
with a carbide blade on the Skilsaw.
What an incredible noise that makes...
More to
come..
Rick
Draganowski
(several
days of good weather coming, That
is good..)
Subject: Return of Rustpuppy report 101
Date: Monday,
February 26, 2001 6:13 PM
Considering
my options on cutting the driveshaft loop to get it right I called town to see
if anyone had a reasonable priced chopsaw in stock.
No one
did but I begged the owner of our Ace hardware store to do the four cuts on his
big Skil chopsaw. I
also put in an order for one of the DeWalt 14” 15 amp jobs for myself. (about 220 bucks.. Rushing out in a buying frenzy
again.. But it is for the
company..)
Anyway
Dan did the cuts and I cleaned up the ends on the grinder and now it is time to
drill the 12 holes needed..
Setup is going to be tricky on the curvy thingie but I have a big drill
press and a lot of clamps and vises..
Tomorrow is another day..
(hmm.. I say fiddlesticks
instead of cussing too.. must have
seen Gone with the Wind when I was too young..)
So
Ror101-1.jpg shows the final configuration of ol’ Loopy.. And after checking Bruce’s
picture against Rustpuppy it looks like the floor where the loop mounts is more
than one inch and mebbe almost 2 inches lower in the Disco.. No wonder nothing seemed to work..
The last
picture for today is a ray of hope.
Spring is definitely starting to show up here. The warmest places are showing the daffodils.. See ror101-2.jpg..

With the
sunshine and blue sky along with the 67 degree temperature today it is really
encouraging.. Most of
my orthopedic problems improve greatly with the better weather and my Nova work
production should greatly improve..
More to
come..
Rick
Draganowski
(will be
slicing steel like bologna next week..)
Subject: Return of Rustpuppy report 102
Date: Wednesday,
March 07, 2001 3:46 PM
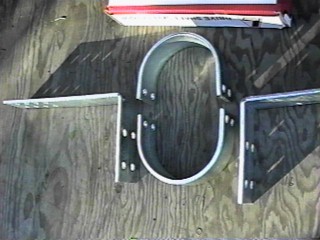
The
holes needed drilling in the cut off pieces of the Lakewood loop. The drill press made it much
easier.. (ror102-1.jpg)
The bolted
together loop and the cut off extra bits show up in ror102-2.jpg. Notice the pronounced dihedral in
the wings.. I think that
will be a problem..
It seems
the Chinese metal bending technology cannot quite make a right angle yet. Ror102-3.jpg shows the L-brackets clamped
down. If the bends were right the
ends would line up.. Not...
The
solution was careful cold-forming of the parts to conform to the task at
hand.. Using a BFH.. (ror102-4.jpg) That is my little #5 hammer (only
3 lbs) Number 6 is 8 lbs..
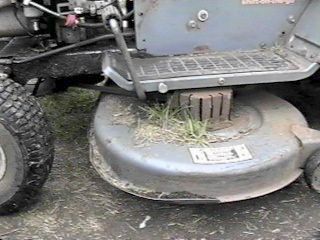
We have
had a very dry winter..
Rainfall is down to only about 30% or less of normal. You can see the grass growing on the
lawnmower is starting to suffer from lack of watering..
After
crawling under, fitting, crawling out, hitting it with the big hammer, and then
crawling under and fitting some more and then doing it again and again I was
tuckered out. The project
stretched into several days because of weather and health problems..
Anyway
had dropped the exhaust pipes because I knew that they would interfere with ol’
Loopy.. I have the long
tailshaft in Rustpuppy and the loop has to be mounted about 3 inches farther
back than ordinarily.. But
surprise, surprise! After getting
it bolted in I find that if I turn the bottom four bolts around so the heads
are on the outside of the loop I have about ¼” or so clearance on both
sides.. Cool. I had expected to have to take
the loop back out till I had the exhaust system properly re-installed for the
changes made..
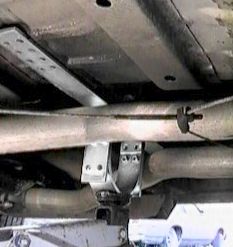
Ror102-6.jpg
and ror102-7.jpg show the final setup on ol’ Loopy.. (notice the one screwed up hole in the floor, damn, I can
never get anything quite right the first time..) It was a bit of a struggle but I promised Chuck Butcher that
I would put a loop in even if I didn’t have to..

Now I
gotta get the exhaust system hooked back up and get back to work on the
interior..
More to
come..
Rick
Draganowski
Subject: Return of Rustpuppy report 103
Date: Saturday,
March 10, 2001 6:32 PM
Yesterday
I took care of the exhaust hookup on the drivers side and today got the
passengers side squared away.
Ror103-1.jpg and ror103-2.jpg show how close the exhaust pipes are to
ol’ Loopy. It looks like
only 1/8” on the drivers side and over ¼” on the passenger side.
When I get the exhaust pipes modified to fit correctly
without the probe and drogue kludge I will have Tim make sure that there is
plenty of clearance.
I was
amazed at the like new condition of the left front body bushing rubber
biscuit. That is an original one
and it has been there since late 1975..
Long time for a rubber part..
(ror103-3.jpg)
The
exhaust hookup was complicated by the fouled up measurement I made way back
when I first got Goody going in Rustpuppy.
The two
probes I made, I call them Orville and Wilbur, are identical twins. Orville on the drivers side mates with
a drogue I call Mary Elizabeth.
She is thrilled to be getting any probe at all and works just fine.
Wilbur
over on the passengers side wound up with a drogue I call Sheila. (after a girl I dated back in my Space
Center days..) Now Sheila requires
a lot more than Mary Elizabeth to make her happy. You know what I mean.. Things were fitting so badly that the Super Turbo on that
side was hitting on the floorpan and making really terrible sounds..
So I had
to make an extension for Wilbur to make things work. You can see the probe augmentation in the mated pair in the
background in ror103-4.jpg. With
the use of the extension Wilbur and Sheila managed to make things come together
properly and get the job done..
Ror103-5.jpg
shows the Mickey-Mouse emergency brake hook thingie I made after losing the
proper part in the grass during the rear axle replacement. It is much shorter because I just bent
it to fit so I didn’t have to move the adjustment nut back to where it
belonged. I was anxious to get on
the road you see..
It was a
beautiful sunny day today and I think I got another little sunburn because I
started early and the shade from the shade tree was missing.. You can see it was great in
ror103-6.jpg..
I think I burn so easily because living in Oregon for 21
years has given me a very pasty white frog belly looking skin.. When I lived in Florida or Texas
it was completely different.. When
I was laying on the plywood in the sun working on the exhaust system I pulled
up my pantlegs to get some sun on my pasty ol’ legs.. It was creepy seeing them in the sun bare. Like a dead man.. You can see the shade hadn’t got
to protect me yet in ror103-7.jpg.

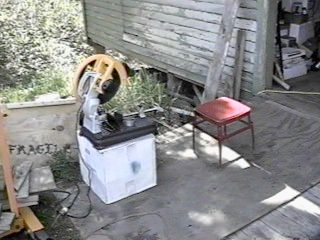
When I
was making the extension for Wilbur I hauled out the Chopsaw and set it
up.. Cutting steel like
bologna.. Too
cool... I love it... You can see the little end off
the extension sitting on the base of the saw.. (ror103-8.jpg)
More to
come..
Rick
Draganowski
(making
sparks is good)
Subject: Return of Rustpuppy report 104
Date: Tuesday,
March 13, 2001 6:16 PM
Moving
ahead on the interior project I started with the template (made from aluminized building paper) sitting on
the handy box the rear axle came in..
(ror104-1.jpg)
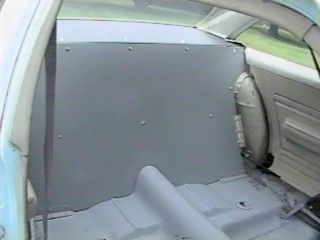
Ror104-2.jpg
shows the target area that will be fully boxed in with the 0.090 aluminum.
When I
attempted to cut the aluminum to the correct shape (making an enormous noise
with the carbide bladed Skilsaw) I found that I could not cut anything but a
straight line. Not very good. (ror104-3.jpg)
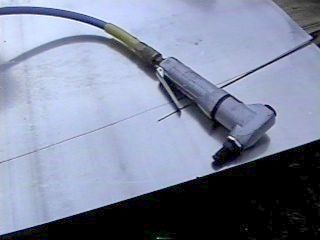
After searching
for hours I found my air powered nibbler.
Duck soup with this I thought. Not. The
jaws of the nibbler were jamming and I could make only a tiny nibble. Bummer.. (I think the nibbler is rated at 0.63 aluminum and was
overloaded at 0.090..) (ror104-4.jpg)
But
skill and science prevailed and the job got done.. See ror104-5.jpg..
I put on
the Starrett metal cutting blade for my 12” Craftsman antique wood bandsaw that
I had bought several years ago for cutting aluminum. Then I had to turn the saw around to get the clearance
to slide the long workpiece through there.. The blade speed is still set for wood so it really
zips through the aluminum..
(ror104-6.jpg) You
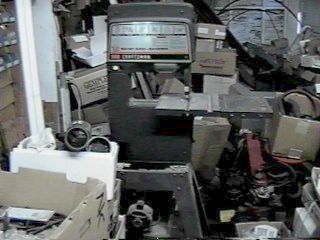
can see that end of my shop is overloaded.. Note the old Nova 250 six TH200 assembly crowding up the
area.
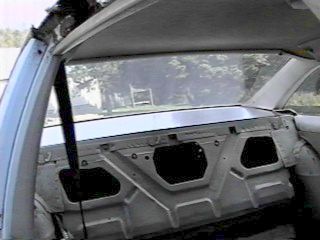
I
notched the plastic rear window trim bits to make room to slide the aluminum in
and it went in fine and fit perfectly.
Excellent, better than I expected.. (ror104-7.jpg and ror104-8.jpg)
Next it
is time to make the template for the vertical firewall piece. It will extend from the top clear down
to the floor and be fastened all around to structurally reinforce the body of
ol’ Rustpuppy.. Lotsa
crawling around in the back seat area for the ol’ cripple coming up..
More to
come..
Rick
Draganowski
(bandsaws
with narrow blades is good)
Subject: Return of Rustpuppy report 105
Date: Wednesday,
March 21, 2001 6:10 PM
We left
the story with me about to crawl my old fat body into the back seat area and
make a template for the vertical firewall.. Ror105-1 shows the first cut at the job. I use a two stage process with these
kind of projects. First a rough
template which gives me the information I need to generate the operational
template. I have found that
it is impossible to get the initial template fitting good enough because of the
inevitable mistakes that creep in.
Ror105-2.jpg
and ror105-3.jpg shows the rough template being transferred to the operational
template.
The
initial fitting of the operational template shows the fine trimming needed to
make it correct. (better a little
too big than too small) (ror105-4.jpg)
After a
couple hours of cutting and fitting I was happy with the result.
(ror105-5.jpg)
I have
big impressive scars in my hands from working with sheared or freshly machined
metal that has not been deburred and the edges broken. I took the time to do it with my
nifty little deburring tool.
(ror105-6.jpg)
Then
securely clamping the operational template to prevent shifting during transfer I
got the correct outline on the aluminum sheet. (ror105-7.jpg and ror105-8.jpg)
At this
point I sat an looked at the pattern on the sheet and thought..
It would
be difficult and downright dangerous to try to manhandle a piece this big
and cut it out on the
bandsaw. Some experiments with the
Sawzall and scraps were no fun either.. What I needed was a plasma cutter.. Hmmm.. Them cost serious bux..
Then I
realized that Wayne Adams at the Sea People Manufacturing boatworks (where I
bought the aluminum) has a spiffy plasma cutter..
I
bundled the sheet into the Suburban and hit the road to the boatworks..
That was
yesterday afternoon. Wayne
sez today it will be ready to pick up tomorrow.. He would have done it today but he forgot and when I called
to remind him he had left his phone off the hook.. Bummer..
Made the 10 mile trip for nothing.. But wait.
I found some great short angle pieces in Wayne’s scrap box to make the
needed brackets for the sides and bottom of the firewall so it wasn’t for
nothing..
The best
way to make difficult cuts in metal is to have someone else do it..
More to
come..
Rick
Draganowski
(when is
a cheap plasma cutter coming on the market?)
Subject: Return of Rustpuppy report 106
Date: Friday,
March 23, 2001 4:26 PM
The
weather has been crappy for two days now.
50 degree drizzle mixed with cold fog and the slugs have been dancing
all over the yard.
Yesterday
afternoon I fetched the aluminum firewall from the boatworks and with a bit of
a break in the weather got some stuff done today.
Ror106-1.jpg
shows the cutout aluminum next to the pattern. Ol’ Wayne did a pretty nice job on the cutting. He just used his big bandsaw and never
even had to fire up the plasma cutter.. He charged me 10 bucks and it really was worth it..
Naturally
the edges all around were savagely sharp and jagged so I took the angle grinder
with the flap disk and cleaned it up all around on all edges. I can still taste the aluminum from the
dust kicked up.. See
ror106-2.jpg..
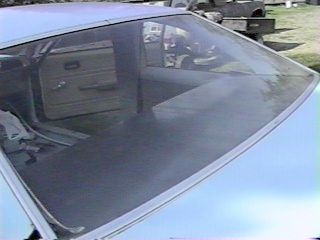
Then it
was the big moment. Will it fit in
Rustpuppy?
Ror106-3.jpg
shows the answer..
Cool.. Pretty close and
with a little more grinding it will be perfect..
It is
supposed to rain buckets this weekend so progress will probably be slow..
More to
come..
Rick
Draganowski
(sloshing
around on the “Happy Slug Ranch”..)
Subject: [nova] Return of Rustpuppy
report 107
Date: Monday,
March 26, 2001 4:54 PM
It did bucket
down Saturday and most of Sunday but late Sunday afternoon the break came. I proceeded to mark and grind the
firewall to clean up the last non-fitting bits. It came out nice.. See ror107-1.jpg and ror107-2.jpg..
Then I
got ready for the primer coat. I
am using a dark primer from DupliColor for the package shelf becase the cool
self-etching stuff from NAPA is much too light in color.. When I washed the parts prior to
painting I could see that there was a oily film adhering to the surface. I bet the rolling mill has switched to
silicone oil.. And it don’t
wash off.. Rats.. Sanding it off is the only answer.. Just like the Karate Kid..
Wax
on... wax off.. wax on... wax off..
Ror107-3.jpg
shows the package shelf with the self etching primer (two coats).. Too light.. Later you will see it with the dark gray primer finish coat..
It took
quite a while to do the wax on.. wax off.. trick on the firewall.. I use 6” self adhesive silicon carbide
open grit sanding disks stuck back to back.. No pad, just by hand.. Ror107-4.jpg and ror107-5.jpg.. (need a d-a sander..)
Then the
primer coated pieces went in for the last time.. ror107-6.jpg
Today I
dug into the riveting job.. Just
drilling and riveting and making brackets in a frenzy.. The riveting job took 4
hours and actually was a lot of fun..
The air powered riveter is great..
Ror107-7,jpg
shows the firewall where it ain’t moving from and ror107-8.jpg shows the dark
grey (almost flat black) package shelf..
It ain’t going nowhere either..
Finally
tomorrow I am cleaning up, finishing the primer interior theme and maybe
getting the seat back in.. Then it
is seat time again!..
If it
don’t rain again.. Sigh...
Hoping
the weather stays nice..
I gotta list..
1) replace front shocks with NAPA
whites
2) transplant 1” anti-roll bar from
Junkyard Dawg using the polygraphite bushings and links from Aren.
3)
finish
final adjustment on left front wheel camber
4) install battery cut off switch and
put 3/8” tie down bolts on the battery
box..
5) then it is G-Tech time..
6) and mebbe spend some practice time
up at the 1/8” mile strip up in Coos Bay.. (but it is 70 miles away, sigh..) It
would be best to make a fool of myself there since no one knows me.. It is much easier for me to be an
idiot in front of strangers..
Rick
Draganowski
(rain, rain,
stay away..)
Subject: Return of Rustpuppy report 108
Date: Thursday,
March 29, 2001 1:12 PM
It did
rain a bunch more but yesterday it ended. Just cool fog so I busied myself making some steel
straps to reinforce the aluminum seat relocation brackets. After they went in I finished the self
etching primer interior theme..
See ror108-101.jpg, ror102.jpg, ror103.jpg, and ror104.jpg.. Notice the matching duct tape trim on
the seat belts..
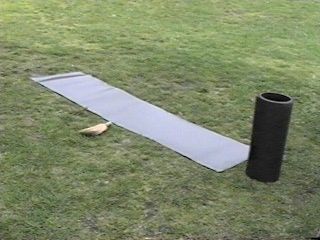
Then the
issue of moving the 85 lb seat assembly from it’s safe haven in the barn/shop
to Rustpuppy. It is too cumbersome
and heavy to try to walk with for an ol’ cripple like me so I hit on the idea
of plopping it on a small silver tarp and dragging it across the soggy muddy
yard..
That
worked good.. (ror108-5.jpg and
ror108-6.jpg)
It was a
real hassle getting the seat back into Rustpuppy so I took my time.. (and wasted most of the
afternoon..) But eventually
it was in place. (ror108-7.jpg,
ror108-8.jpg and ror108-9.jpg)
What a relief that was..
But, (why is there always a but?)
The
addition of the steel straps to the seat brackets changed things just enough so
the bolts didn’t quite line up..
Things never seem to fit perfectly the first time.. I quit for the day, leaving the
boltup work and the seat belt threading and tightening down for today..
I had
hoped to get at least 8 hours of sleep last night but the suppressed excitement
of knowing that Rustpuppy would be on the road the next day defeated me.
So I was
out bright and early digging around ond the misaligned bracket problems.. (the
lack of sleep is going to cost me later if I am not careful)
Loosening
up all the bolts and a bit of judicious prying and hammering and the hardware
all came together. Considerable
standing on your head time in the back seat area but I got through it safely..
It was a
great feeling to sit down in Rustpuppy and start her up and make her move.. I
went for about a 5 mile run to see if everything was ok.. It was.. It is funny how strange (low and perky) Rustpuppy feels
after wheeling the big old Suburban for a couple months..
I parked
her up next to the Suburban and will go to town in her just after finishing
this report.
(ror108-a.jpg)
More to
come..
Rick
Draganowski
Subject: Rustpuppy goes to Town.. No cheese with the whine..
Date: Thursday,
March 29, 2001 4:45 PM
The trip
to town went well. I stopped at
the saw shop to see Chris and show off Rustpuppy a little.. His helper wasn’t at the shop so
Chris couldn’t go for a ride..
Then after the mundane chores
(groceries) I stopped at Jeff’s office. I have been aggravating Jeff since 1980.. He put his kid in charge of the
office and piled his bulky bod into Rustpuppy.. (he weighs over 360lbs.. I am a lightweight at 296..) Between us we were the equivalent of
almost 5 people..
Anyway after we got away from town, and I could show off a little, his
responses were as follows..
Launch-- Holy Shit!!
1-2
shift- Holy Shit!!
2-3
shift- Holy Shit!!
I guess
he was to stimulated to be creative..
With
Jeff in the car the traction in first was much improved.. I could barely spin the tires at
all... Hmmm.. On some tracks it may be
worthwhile having a passenger..
Mebbe a smaller one..
I am a
little concerned about the whining coming from the new axle. It is very noticable at certain rpm’s
like there is a resonance in the system..
I think
the hocky puck like polyurethane front eye bushings on the rear springs
combined with the hard polyurethane spring pad adds to the noise transmission
to the floorpan. And guess what I
have riveted solidly to the floorpan almost right were the spring mount
attaches.. A nice resonant
piece of aluminum.. Hmmm..
I notice
that since I took the carpet and pad out of the Suburban the 10 bolt in there
whines a little at certain speeds too..
I am
stilll going to do some recording of the whine and mebbe get with Wade (the
axle builder) about this issue..
Ol’
Rustpuppy ran flawlessly today..
The only detail is a little roughness in the motor above 5600rpm.. I suspect the bone stock Delco 1977
truck HEI just ain’t cutting it above 5500rpm..
Now that
it is test and tune time I think I will transplant the high voltage coil off
the Proform distributor and see if that makes a difference..
I am not
sure that the front shocks on Rustpuppy even need replacing.. On the bumpy back road to my place the
shocks seemed to be working just right..
Hmmm... That just
leaves the camber fine tune and the neutral interlock switch wiring.. And the trunk battery hold down bolts,
and the main battery disconnect..
And a ton of body work..
And the
whine recording and investigation..
Tomorrow
is another day..
More to
come..
Rick
Draganowski
(you
don’t notice the whine when you are racin’..)
Subject: Rustpuppy Run Test&Tune 1
Date: Thursday,
March 29, 2001 6:17 PM
I
couldn’t hold myself back so I dropped everything in the office and got
Rustpuppy back on the road..
On the
southbound run everything was perfect, the weather fine, the road fast, the
wind still, everything but...
Nother
damn but.. Rustpuppy was not
quite up to race operating temperature from the easy 2 mile downhill trip to
the head of Rustpuppy Run..
So there
was a hesitation at launch. Not a
bog.. Just a drawn out
hesitation... Damn.. After that
Rustpuppy took off like a scalded cat..
But the results of the Southbound run was a little disappointing.
Remember
though, no tuning has been done yet..
That is a starting point..
I went
up to the private turnaround.. Ever
since I got caught up in the herd of rollers I have been shy about turning
around at the rest stop.. I
was calm and clearheaded and felt confident.. But the best laid plans.. I was a little hurried to stage since there was
following traffic and I had very little time.. The launch was perfect though with the front and
rear of Rustpuppy eagerly leaping into the air as both rear tires spun about 1
½ revolutions..
But
there is another damn but...
There was some uneveness in the pavement since I was staging about 100
feet up from the best spot and the traction was messed up. With the posi axle when one tire
lost traction the rear jogged to the right with alarming speed.. Since I was on the causeway and there
was no room for this kind of foolishness I let up on the throttle
instinctively.. And naturally the
damn TH350 upshifted because I had signaled with partial throttle.. Poop..
I stayed
on it but the run was a dismal 14.26@102.3..
And the
wind was picking up and the dew
forming so it was time to go home..
More to
come..
Rick
Draganowski
(Test&Tune
is good)
![[ Back Button ]](../gif/t_back.gif)
![[ Go Home Button ]](../gif/t_home.gif)
![[ Next Button ]](../gif/t_next.gif)