Subject: Rustpuppy
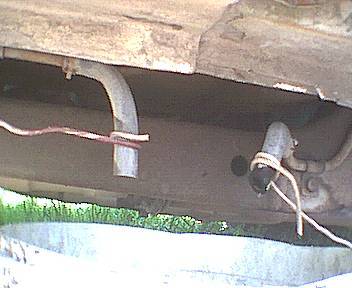
Test&Tune 149
Date: Wednesday,
April 16, 2003 7:53 PM
It has been far too long since the last report.
First I want to apologize to the list for my silence and for the
grumpy nature of the few posts I
have made in the last couple months..
What happened is that I took on a contract job with an unreasonable schedule
and unforeseen difficulties.
I was desperate for the money and it was doing a friend a favor so I
gave it my best shot.
But I am too old for the long hours and difficult (read impossible)
deadlines and ended up sick as a dog from the stress.. My heart issues reared their ugly
head for the first time in about three years and my arthritis took a serious
turn for the worse..
But despite missing the first deadline (due to illness) I made the
second one and am past 90 percent of the difficulty.. Whew..
I really got messed up.. Almost had to go to the Emergency room.. And then to add insult to
injury the weather for the last month would have been more normal in
February.. It has been
unusually cold, windy, and rainy..
Brr.. I am behind in everything..
I ended up with open ulcers on my feet. (they are all twisted up from the arthritis and even a
little bit of walking causes pressure sores.. Hell..) Doctor
Williams did a little surgery on them yesterday and I am supposed to stay in
bed.. And not even sit
at the computer.. So
with my laptop out of service I am really out of it..
But enough whining..
We only had about 2 or 3 good days out of the last 7 weeks of
miserable weather.. But I
did manage to fool with Rustpuppy a little.. Took her to town last month and filled the tank with 92
octane Texaco (Shell). It
seems to be pretty good gas this time so I am looking forward to some racing
and testing of the Drag Radials.. I did one 0-60 run on the old road.
Pulled a 5.12 second time despite wheelspin due to the dampness of
the road.. I
need dry roads for proper testing..
Damn.. It has
rained every day for more than 5 weeks straight.. And it has been cold too..
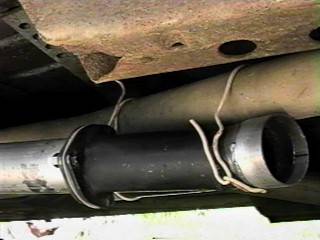
I did find out that without any obstruction of the exhaust the
circulation through the crossover passage in the Performer manifold is poor and
the hot spot never gets more than lukewarm till the motor is fully warmed up.
This is why I am stuck with the bogging problem.. But since the heat is not
working but Goody performs flawlessly when up to operating temperature I expect
to get good results from the Vic Jr manifold that is waiting for installation..
Edelbrock has delayed shipping the special Q-Jet to single plane
adaptor for over a month but I expect it any day now..
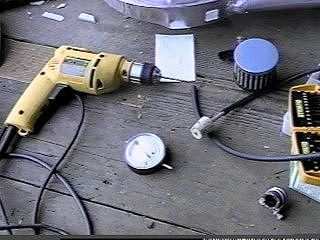
During another momentary break in the weather (it was still too
damp and windy for serious racing) I did manage to check the g-force readings
on a reasonably dry stretch on the old road.. It was difficult as most of the time
the cold bog interfered with a good reading.. Here is a batch of them.. 0.75G, 0.72G, 0.73G, and one
pretty good one at 0.80G..
So I am expecting good things when it is possible to race safely..
I took the cutout assemblies to town (in the Suburban) and showed
them to Tim Harding and asked him how much it would cost to make the 4 cuts and
welds to install them on Rustpuppy.. He said only 30 bucks! I guess he pities me..
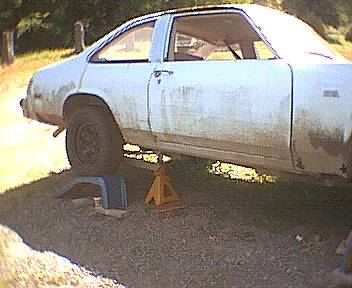
I still have to do some under Rustpuppy work to move the emergency
brake cable guide rod (replace it with a different design) so Rustpuppy is half
way jacked up high enough for drilling some holes under there.. And it has rained and rained..
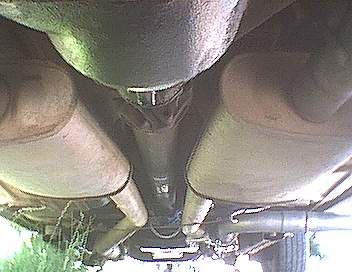
After establishing a baseline the cutouts go on (and the noise
gets serious).. And after
testing of those the Vic Jr and special adaptor go on.. I have to get another
Pyrometer going to verify the effects on mixture and fuel distribution as
well.. So there is
plenty of work pending on the Rustpuppy front..
I better go lie down for a while..
More to come..
Rick
Draganowski
(sorry
old basket case)
Subject: Rustpuppy
Test&Tune 150
Date: Sunday,
April 20, 2003 4:13 PM
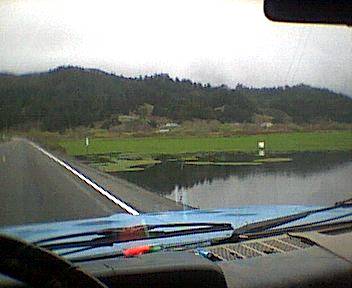
It has been an extra wet spring.. Including winter
weather.. In
t&t150-a.jpg you can see the flats below Rustpuppy Run are flooded. This picture was taken
after most of the water drained away. The whole flat was flooded on both sides of
Highway 101.. A
messy place to go off the road..
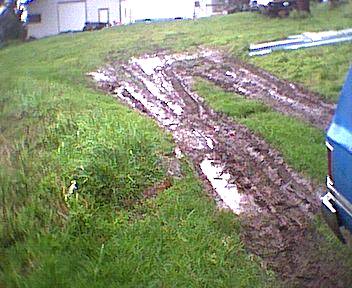
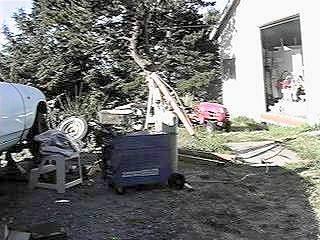
The mudhole in the top of the yard where I have been parking the
Suburban reached critical levels with about 6 or 7 inches of bog.. Right to the limit of
traction so I have been parking the Suburban up next to Yakima Sue and walking
in to my hovel.. See
t&t150-b.jpg.
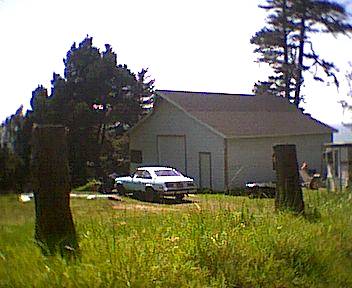
Finally on Friday afternoon the rain stopped and the sun came
out.. I was coming home from
the pharmacy in Gold Beach when I took this welcome snapshot.. See t&t150-c.jpg..
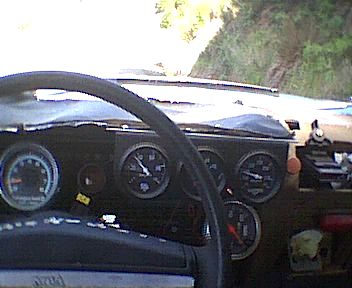
Later that afternoon I went to take Rustpuppy for a ride and found that a damn little bird had found its way in and left its opinion of me on the steering wheel, dash, and windowsills. I don't get no respect.
See t&t150-d.jpg..
I did a couple 0- 60 runs but the roads were still soggy.. It had been raining just
that morning.. Times were
fair at 5.08 seconds and 4.89 seconds on the G-Tech.. And it was great fun..
The prediction for Saturday was for sunny and a high of 55-58
degrees.. I am hoping it
will warm up in my shop enough to allow me to take care of the Ray Buck Axle
Cover Project..
At 11:00 am I noticed that it was still too cold.. About 53 outside and
50 even in the shop..
But..
I noticed that there was no wind at all.. Hmmm.. Maybe it is time to
go out on Rustpuppy Run..
I did one G-force of launch test on the way and got a marginal 0.77g..
When I got to the highway I saw that there was no traffic and no
wind.. And the road looked pretty
dry.. Most excellent.. Since Goody was
not up to operating temp I didn’t expect much from the first run..
It went smooth as silk.. Considerable bog right at launch but it only
lasted a short time.. Then
Rustpuppy took off with gratifying speed.. The shifts came up fast enough to indicate a reasonable run
and the tracking with the Drag Radials was perfect.. Rustpuppy could be held to within an inch
of planned track.. I stayed
on the throttle past the end of the quarter mile to check out the high speed
stability..
All the way up to about 5600 rpm in third (about 112-115 mph) it was steady and solid.. Nothing at all like the squirmy,
squirrelly ET Street wrinklewalls..
Well worth the money for those BFG Drag Radials..
The time was better than expected considering the big cold bog and
Goody being pulled down below 2700 rpm by the cold converter.. It was 13.77@106.2 on
the G-Tech.. And
more fun than I have had in a long, long time..
I was hoping for enough warmth from the sunshine to get my shop up
to workable temperature.. At about
3:00 pm I went out to do some work on
the axle cover..
It was about 57 degrees in the shop.
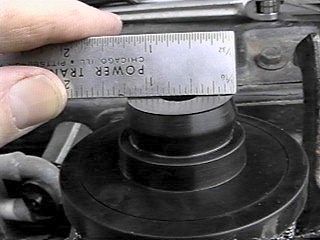
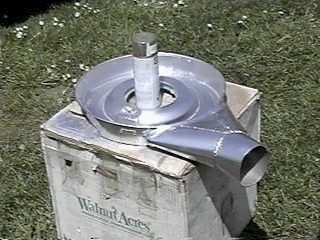
T&t150-3.jpg shows the setup on the Bridgeport to do the rough
milling of the Summit logo..
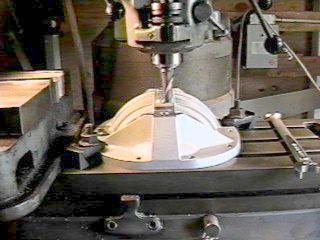
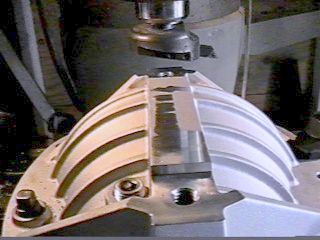
It is mostly gone by t&t150-4.jpg..

And right at the time I took the shot of the first
fine flycut the battery in the camcorder expired.. And since I had been out for an hour so did
I.. See t&t150-5.jpg..
Today, Sunday, another cold front came through.. And it has been cold windy rain most
of the day.. I am staying in
and staying warm..
The prediction says rain and cold till next weekend.. Rats..
More to come..
Rick Draganowski
Subject: Non
Nova Lilies for Easter
Date: Tuesday,
April 22, 2003 6:51 AM
Yesterday I noticed that the lilies have bloomed up at the top of
the hill where I go to pray..
They were there for Easter Sunday..
See pictures..
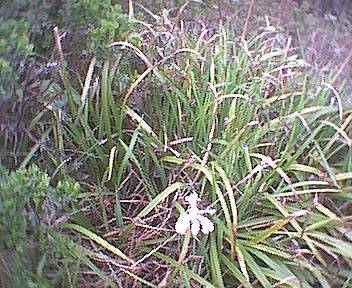
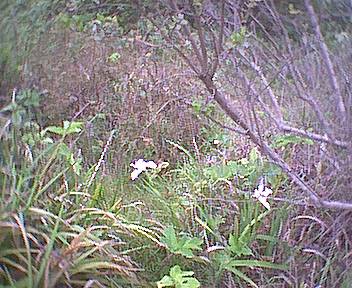
Rick Draganowski
Subject: Rustpuppy
Test&Tune 150 addendum 3
Date: Tuesday,
April 22, 2003 6:58 AM
I had promised (mostly to myself) that Ray’s axle cover would be
in the mail on Monday.. So despite the cold and wet I pushed
myself out into the shop yesterday morning.. It was only 47 inside but I knew that if I
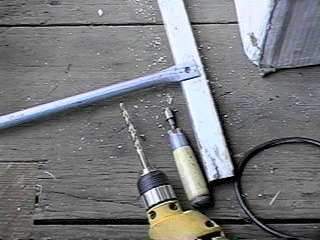
worked fast I could have it finished and ready to ship in just a few minutes..
The finishing of the aluminum casting turned out to be the quick
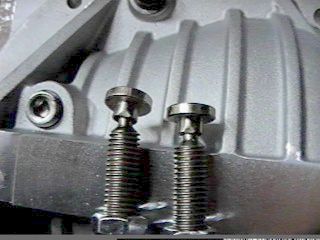
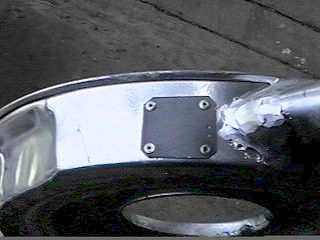
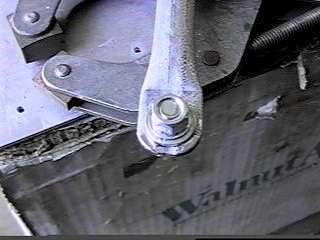
part. Fooling around with the swivel-footed bolts took a little longer. But the feet are in place,
lubed, and peened so they will never fall off again.. See t&t150-6.jpg and t&t150-7,jpg..
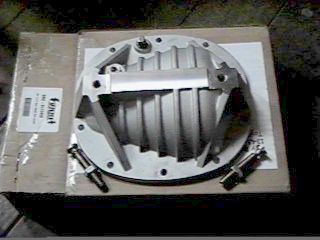
Then after careful packing the box was ready to go
back to Utah.. Delivered it to the
Post Office at about 1:00 pm...
This weather is really getting on my nerves..
More to come.
Rick Draganowski
Subject: Rustpuppy
Test&Tune 151
Date: Monday,
May 05, 2003 8:08 AM
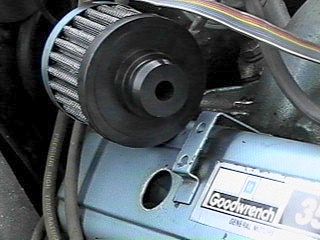
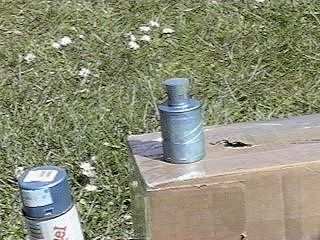
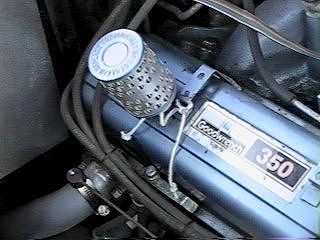
During a small break in the miserable spring weather last week I
checked the air filter in Rustpuppy. I noticed that the filter that fits into the PCV
hose bracket had been blown out and stuck back in the narrow spot at the rear
of the housing.. See
(t&151-1a.jpg)
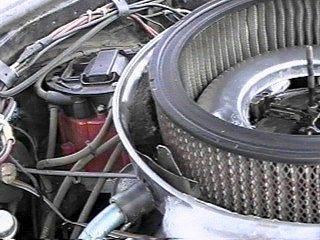
It must get damn windy in there at full
throttle.. This issue preyed on my
mind. There had to be a more
elegant solution. The next time I
was in town when I stopped at NAPA I noticed a new display of Mr.Gasket odds
and ends.. Hanging there was
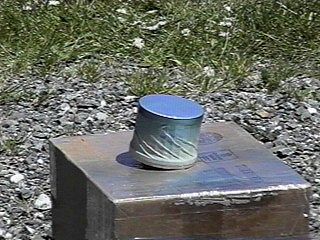
a spiffy push-in filter for the valve cover PCV vent.. Much better.. (See t&151-2a.jpg)
The only problem was the fancy chrome plating.. Entirely out of place
onGoody.. I
attacked it with the die grinder armed with a small flap wheel.. (See t&151-3a.jpg and
t&151.4b.jpg) That
ground the surface down to be rough enough for paint to adhere..
Then I painted it with the Oldsmobile Blue Engine
paint from NAPA.. (See
t&t151-5a.jpg)
Naturally I botched it and put too thick a coating
and caused some unsightly runs.. Damn.. Will sand it off and try again when it stops
raining.. If it stops raining..
And the stock hose system has to be removed and the hole in the
housing covered..
More to come.
Rick Draganowski
Subject: Rustpuppy
Test&Tune 152
Date: Monday,
May 12, 2003 11:12 AM
In the last report I mentioned how I screwed up the Oldsmobile
Blue engine paint on the Mr. Gasket PCV filter. This time I ground the chrome completely off down to
the bare steel. See
t&152-1.jpg.
Then instead of being in a hurry
and putting on one thick runny coat I put on three thin coats.. This is the secret of proper
painting. Never be in a hurry. See t&152-2.jpg and t&152-3.jpg
for the results.
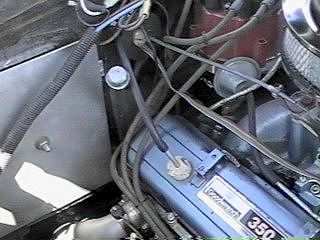
Then it was time for a quick installation. The grommet in the valve cover
yielded eventually and when removed presented a smaller hole than I
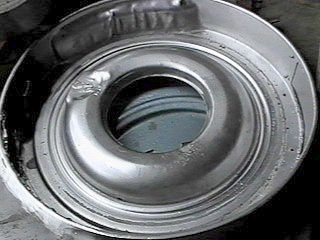
expected.. See t&152-4.jpg.
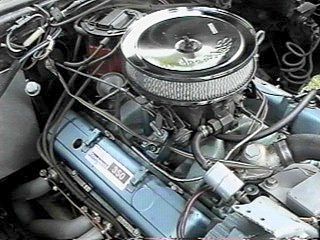
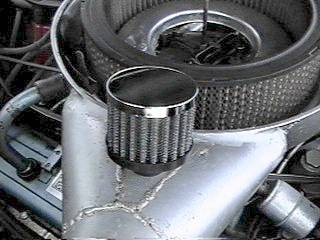
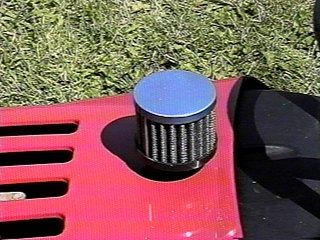
Note the temporary installation
of the tiny Edelbrock air cleaner. The stock stud is too short so I have to install
the top upside down. In
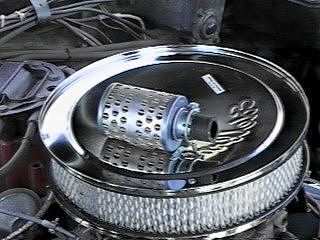
t&152-5.jpg you can see everything was ready.
I had been assured (by someone who should know) that the
aftermarket filter (designed for a 1.25” hole) was proper for this application.. Well that advice was
wrong. In t&152-6.jpg,
t&t152-7.jpg, and t&t152-8.jpg it is obvious that there is a serious
mismatch.

This is due to the diameter of
the hole being less than an inch and the diameter of the rubber spigot being
over 1.25”.
Rats, after all the work on the damn paint. That is what I get for not
checking it myself.
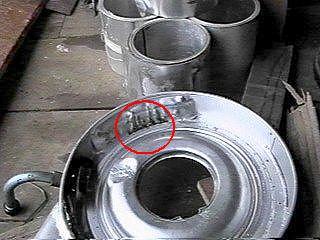
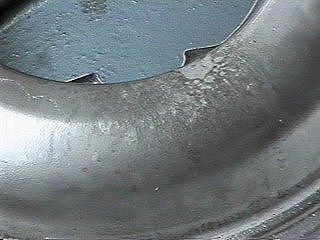
During this adventure I noticed some interesting data. You can see in t&152-9.jpg
and t&152-10.jpg clumps of rust crumbs collected at the bottom of the
restriction in the rear of the air cleaner housing. They must have been sucked into the
snorkel during full throttle blasts..
Rustpuppy is always shedding bits and pieces..
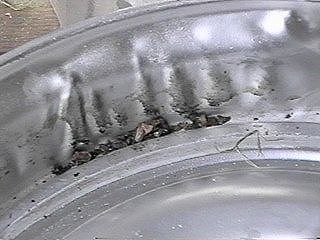
Also notice the base of the air cleaner had a graphic indication
of “reversion” of the intake.
It was installed before the paint was fully cured and the gasoline
discolored the paint.
See t&152-12a,jpg and t&152-13a,jpg.
Note that only the front two
barrels have the marks. This
is because reversion is usually only present at low rpm when the overlap of the
cam sends strong pressure pulses into the intake. They actually make the carburetor work in reverse,
blowing an air/fuel mixture out of the inlet. At full throttle with the secondaries open the rpm
induced inertial effects prevent reversion..
Back on the PCV filter.
In my shop left over from back in 1982 or so I had a new air filter for
the Briggs and Stratton engine on a Sears lawnmower.. It looked like it could be adapted easily to a 1” hole. Since I don’t want to force that
stubborn grommet back in and replace the weenie stock pipe and air cleaner
filter I decided on a temporary installation. See t&152-14a.jpg.
It will take a while to do the
machining on the rubber spigot to get the Mr. Gasket part to fit.
I need to do some modifications on the air cleaner housing. It vibrates and
flexes the thin metal of the housing.
Eventually it will cause fatigue cracking.. I am thinking of support struts attached to the wire loom
brackets on the valve covers.
More to come.
Rick Draganowski
Subject: Rustpuppy
Test&Tune 153
Date: Tuesday,
May 13, 2003 9:37 AM
The endless story continues.. First a digression. I am planning to rebuild and
install a smogger Q-Jet on the Suburban in place of the good race Q-Jet. Like all of my projects
this one is backed up as well.
I had the carbs cluttering up the floor in my office/home and they were
getting in the way. What
better place to store them to both get them out of the way and to constantly
remind me to get busy on this project than this. See t&153-1.jpg
Back to Rustpuppy.
I planned to use the Briggs and Stratton filter for a PCV filter but it
looked shabby with light rust.. So the paint went on. See t&153-2a.jpg
While getting this done I refreshed the paint on the air
cleaner top..
(t&153-3a.jpg)

As the list knows I am always seeking information. I decided that this was a good
time to make an adaptor to allow monitoring the vacuum conditions in the
crankcase generated by the stock PCV system. See t&153-4a.jpg and t&153-5.jpg
The vacuum was about 5-6 inches
of mercury at high idle and low throttle settings. It dropped to zero after about 30-40 seconds when I blasted
down the back road at full throttle trying to stay alive and watch the gauge at
the same time..
Back to the filter.
In t&153-7.jpg you can see that the adaptor to fit it to the valve
cover was just a piece of ¾” heater hose.
T&153-8a.jpg and t&153-9a.jpg show the final
result.
Note the lanyard attached to the filter. The fit from the heater hose to
the valve cover was not very tight so I thought it would be a good idea to
tether the filter so it wouldn’t be lost if it vibrated or blew out on the
highway.
The last picture (t&153-10a.jpg)
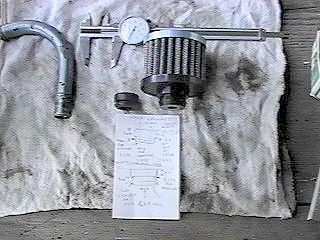
shows the stock pipe and
grommet, the fancy new filter, and some engineering notes about
dimensions.. This is
to remind me of another project that is waiting for attention.
More to come.
Rick Draganowski
Subject: Rustpuppy
Test&Tune 154
Date: Thursday,
May 15, 2003 11:58 AM
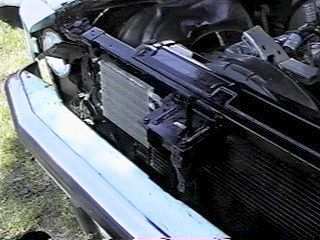
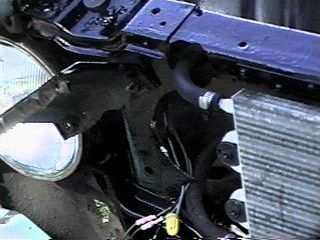
After getting into painting just a bit in the last report I
noticed how shabby Rustpuppy’s core mount and cold air inlet were looking. It only takes a few months
in this location for stuff to start deteriorating. See before pictures. (t&154-1a.jpg, t&154-2a.jpg, t&154-3a.jpg,
and t&154-4a.jpg)
Then breaking out the trusty old Rustoleum and the foam brush I
got to work. See after
pictures. (t&154-5a.jpg,
t&154-6a,jpg, and t&154-7a.jpg)
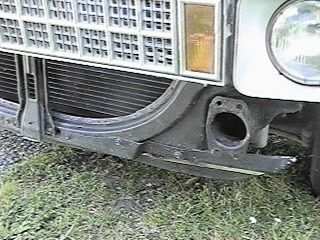
With the top part of the front end done the lower part started to
look shabbier.. But
the bumper has to come off for that.
More to come.
Rick Draganowski
Subject: Rustpuppy
Test&Tune 155
Date: Thursday,
May 15, 2003 1:44 PM
Making short work of taking the bumper off (the bolts are clean an lubed hehehe) I
pressed on with the balance of Rustoleumizing Rustpuppy’s front bits.. See before and after pictures attached..
But.
Since the bumper was already off, even though the air cleaner
wasn’t finished and the weenie Edelbrock mini-filter in place, perhaps it would
be a good time to check the weather and traffic conditions?
More to come..
Rick
Draganowski
(it
was a really good day)
Subject: Rustpuppy
Test&Tune 156
Date: Thursday,
May 15, 2003 8:09 PM
Now we are getting to the fun part.
After fooling with the painting under the front bumper. (now
removed) I was inspired and went
ahead and lightened Rustpuppy as much as possible. I took out my spiffy large dial Health-O-Meter
scale and weighed stuff as I went.
Here is a list of the weights again.
1) front bumper plus shock
absorbers, tin panel, and nuts and bolts. Exactly 85 lbs..
2) spare tire (old FR78-14
Michelin that almost matches the 235/60-15 Drag Radials in diameter) 40lbs
2) bumper jack plus stock
lug wrench and a large cross type lug wrench 15lbs
3) premium 15 foot jumper
cables from NAPA 7 lbs
I vacuumed the collection of gravel and dirt that had accumulated
in the trunk through the large holes in the quarters. Don’t know the exact weight but I bet it was at least
10 lbs..
Total removed from front 85 lbs
Total removed from rear 62 lbs
Grand Total removed fixed weight 147 lbs (plus 10 lbs of gravel and dirt)
For a Super Grand Total of fixed weight removal at 157 lbs.
Plus I had run out half (11 gallons) of the full tank of gas I
started with (had during last run) 66lbs
So Rustpuppy’s race weight was down the Super Duper Grand Total of
223 lbs..
(plus I have lost some lard as well)
It was late in the day, about 5:30pm so I knew the traffic may be
heavier than normal due to our “rush hour”. There was no wind at all. It had been dry for two days.. Hoo haa!
I jumped in Rustpuppy and took off down the old road. Doing full throttle bursts
to speed up the warm-up. Down at the bottom of the hill I staged for a warm-up
0-60 time. After long
delays in getting out to race the process gets more intense.. Despite a slight
initial bog the time was good at 4.71 seconds.. Oh boy..
Out to the entrance of Highway 101. I was right about the traffic. Cars were coming about 5 or 6
hundred feet apart..
Too cluttered for safe racing.. I cooled it and just backed Rustpuppy
away from the highway to wait for a break in traffic without lurking right at
the highway’s edge.
The break came and I blasted out on highway 101 trying to get to
the southbound staging area as fast as possible.. I love driving Rustpuppy.. Staging area was dry
and clear and there was no traffic in front or behind.
I tried to relax and just sit for a few seconds. Then checked level and
pushed the button on the G-Tech for a run.
At launch there was a small amount of wheelspin from the Drag
Radials due to the lightening of the rear.. It was enough to bring the launch
rpm above 3000 rpm.. This is
good.. The run went
great with Rustpuppy tracking on the windless highway like an arrow.. I stayed on the throttle a bit
past the quarter mile since because of the sun glare I could not see the led
display on the G-Tech..
Then I hit the brakes and pulled Rustpuppy down to a sedate 60
mph.. I shaded the G-Tech
with my hand and could see the time of 13.39.. Good show. And I haven’t even done any tuning for this
season. And Goody was
pulling air through the teeny restrictive little Edelbrock air cleaner without
the cold air inlet..
This is good.
At the second turnaround I sat for a while to relax and wrote down
the whole time It was 13.39@107.6.. Great fun.
I lurked along the highway and waited for a few cars to pass. Then I blasted up 101 to
get to the northbound staging area.
Without the cold air induction and with the extra salt spray on the
highway at the south end I didn’t expect much..
I was right, the wheelspin (of the Drag Radials for goodness sake)
was much more than optimum and some time was lost at the launch. Everything else worked fine
and it was a comfortable run.
I did notice that the sound of Goody seemed higher pitched and scratchy
at high rpm’s. This was probably
due to the tiny air cleaner.. The run ended without incident and since I
could see the led’s I got off the throttle quickly.. By the time I motored slowly back to the turnoff
to my place traffic was coming both directions as far as I could see.. The time for the northbound run was 13.47@107.2 on the G-Tech.
It is two days later but just writing this up has me worked up and
I am shaking from excitement a bit.. It is a great cure for depression..
Now for some technical thoughts that have occurred to me over the
last few months.. It has been puzzling me that the high speed tracking with the
Drag Radials seems much better than the Radial T/A street tires. Then it came to me. I had found
that that optimum traction with the street tires called for a pressure of only
22 psi. When I installed the
Drag Radials I aired them up to 28psi. This makes a significant difference. And I like it a lot.. Just the
opposite of the M/T ET Streets..
Stall at launch is a variable that is difficult to control. The ideal situation would be to
invest in a Midwest converter set for 3300-3400 rpm. Since I can’t afford that,
setting things up for a slight wheelspin is the only way of getting a really
good launch.. But it
sure as hell is not repeatable enough to depend on.. Launch stall below 2800rpm really pulls Goody
down too much..
It is still great fun and when the good runs happen it is a joy..
These were Rustpuppy Runs number 174 and 175..
More to come..
Rick
Draganowski
(racing
is good)
Subject: Rustpuppy
Test&Tune 157
Date: Saturday,
May 17, 2003 11:56 AM
I spent an hour or so (on the last warm day, Thursday) covering
the hole left by the stock valve
cover breather gizmo. See t&157-1a.jpg, t&157-2a.jpg, t&157-3a.jpg,
and t&157-4a.jpg
While I was at it I refreshed the paint.
The weather turned against me that evening with another damn cold
front. (at least this one is cold and dry instead of cold and wet) But I was out working on
Rustpuppy Friday anyway.
There was a cold wind from the ocean and the temp never got much past 50
degrees.
Still cold today.
The simple little job described below took 5 hours.. Cold weather really slows
me down..
Remember back in Test&Tune 152 I said this: “And I need to do
some modifications on the air cleaner housing. It vibrates and flexes the thin
metal of the housing. Eventually
it will cause fatigue cracking.. I
am thinking of support struts attached to the wire loom brackets on the valve covers.”
I wanted to get this done and get Rustpuppy’s cold air induction
system back on for more racing. First I just stood next to Rustpuppy with the
hood up looking at the problem for a considerable length of time. Then I got the idea
of turning around the mounting bracket for the alternator and using that as an
attachment point for a sturdy strut.
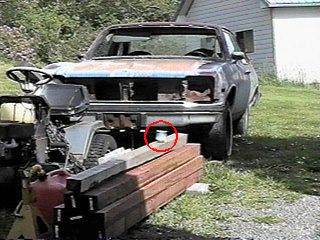
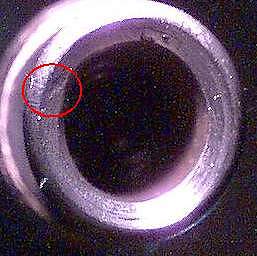
In t&157-5b.jpg you can see the attachment points I visualized
in the red circles.
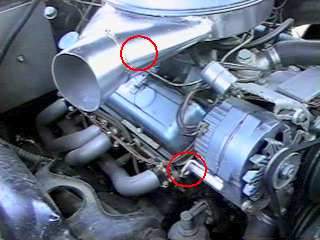
I decided to fall back on an old standby of mine for this
kind of thing. Good
old half inch thinwall conduit. In a proper design it is a lot stronger than you
think. You just have
to remember to grind the zinc off before welding it. In t&157-6b.jpg you can see the chunk of
conduit I am using has had it’s end flattened neatly in the Kurt AngLock vise
on the Bridgeport. (that
thing squeezes harder than any other vise I have ever used) I am getting ready to drill the
3/8” hole for the bolt to the bottom bracket.
I drilled the hole, then ground the end to a pleasing curve and
did the preliminary install for the next stage. See t&157-7b.jpg, t&157-8b.jpg, and
t&157-9a.jpg,
Going to take a little tweaking. Judicious bending of the conduit and repositioning of
the bracket brought us to t&157-10a.jpg.
Marking and cutting to length took only a few minutes of hacksaw
work. See t&157-11a.jpg.
Then I farted around measuring
and marking the strut to be sure that when I flattened the upper end it would
be at the correct angle to match the
snorkel. I lucked out
an got it right. See
t&157-12a.jpg..
Then I drilled a ¼” hole for the
top stud and wingnut I planned on using and then ground the end to a nice
curve. See
t&157-13a.jpg.

Marking, drilling, and messing about with the location of the top
stud took a lot more time than I expected. Eventually I had to tweak the housing a dozen times or
so with the peen end of my number 3 hammer to get the stud to mount at the right
angle. But it finally
went together just as planned. See t&157-14a.jpg.. I am using stainless steel hardware for
the top stud and wingnut.
Now I have to wait till the everlasting cold wind to die down for
some more
racing..
More to come..
Cutouts are next..
Rick
Draganowski
(old
and cold, and slow)
Subject: Rustpuppy
Test&Tune 158
Date: Sunday,
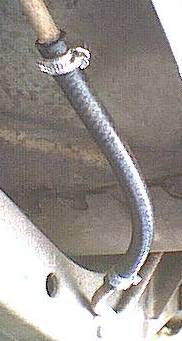
May 18, 2003 11:36 AM
Yesterday afternoon I subjected myself to the bitter cold north
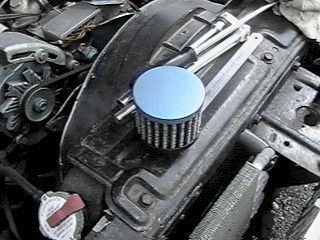
wind to put the aluminum hose back on Rustpuppy’s snorkel. The aluminum is starting to
corrode so I plan on painting it soon. When the damn wind stops. See t&158-1b.jpg and t&158-2b,jpg for Goody’s
current looks.
Getting Rustpuppy’s cold air induction system back together inspired
me to take a little test ride. I noticed immediately that the sound of Goody
was back to normal with a deep growl instead of the tinny howl with the mini
air cleaner..
Much more satisfying..
I just went to the other end of Coy Creek Road to do a couple 0-60
times.. They went
excellently well with a time for the first one at 4.71 seconds on the
G-Tech. Then I
immediately backtracked and turned around in the middle of the road to make a
second run from the exact same launch area. It felt good, and the time was 4.70 seconds.. Nicely consistent when
there is no wheelspin..
The asphalt I am launching from on the old road is weathered with the
sharp gravel showing.
Abrasive but great traction..
Due to the lack of wheelspin and the cold weather keeping the ATF
thick and cool so the stall speed is lower the launch times are slower than
they would be on a warmer day, or with slightly less traction.
On the way home I set the G-Tech for g-force and did one launch on
the newer pavement.
Slight wheelspin and a reading of 0.78g.. Someday I hope for consistent 0.83 - 0.84 g but probably not until I
get a new torque converter. Flash stall on the 0-60 times was going only to about 2700-2750 rpm
which is about 400-500 rpm too low for Goody.
One other note about the 0-60 times.. Since I am going fast on a narrow and bumpy old farm
road (the area I use has no entrances or driveways) I must keep my attention on
the road. Between that and the sun
glare it is impossible to see the signal for the 0-60 time from the
G-Tech.. What I normally do
is run to the shift light in first (about 48mph), shift, and then stay on it in
second until I get the light for the 2-3 shift. (about 78mph)
This is pretty damn fast to be going on a narrow bumpy road but
Rustpuppy handles it beautifully.
After I got home I parked Rustpuppy next to Junkyard Dawg. See t&158-3b.jpg
I mowed my acre of grass just 5 days ago and it almost needs
mowing again.. I guess
it is the sunshine.
This has been a strange several days as far as the weather is
concerned. Down in the 30’s at night and clear and cold in the upper 40’s to
lower 50’s in the daytime with a nasty wind out of the northwest to
north.. A large
dry cold air mass sits offshore making me miserable..
Hoping for warmer weather.
More to come.
Rick Draganowski
(still cold, even indoors, from that damn wind)
Subject: Timing
and whining
Date: Sunday,
May 18, 2003 2:44 PM
The cold wind from the north persists. The only thing I got done today (so far) is check the timing on
Goody. Yup, still 12 degrees
initial and 34 degrees total (centrifugal) advance at about 3300-3400 rpm, Actually when I checked the TDC
location on the cheap Proform 8” damper with my home made piston stop I found
that the TDC is 1 degree off.
So the actual operational advance I figured out with trial and error
(emphasis on the error) is 11
initial and 33 total. (centrifugal) The MSD distributor is not only a work of
art it is mechanical and electrical and electronic perfection..
But even this tiny job was difficult.. Since I planned on staying in due to the cold
weather and do paperwork naturally I got a migraine (cluster) headache about
noon. Which made
me blind for the most part with flashing lightshows in the center of my field
of vision..
Damn.. And I was
driving Rustpuppy to get Goody up to operating temp for the timing check.. At
least I had my peripheral vision.. No racing and no funny business though.
These damn headaches leave me stupid and sick for about two days
afterward..At least I can’t complain about it being age related as I have had
them since I was 17 years old..
Whine, complain.. At least I can read now even if I feel like
crap..
Even my eyes hurt..
More to come.
Rick Draganowski
(have approximately the ambition of a snail that can sleep for two
years)
Subject: Rustpuppy
Test&Tune 159
Date: Tuesday,
May 20, 2003 1:01 PM
Yesterday (Monday) I had business in town and an appointment back
home at 1pm.. So instead of
waiting till the sun did some good on warming the place up I went out about
10am.. I noticed as I
headed for the Suburban that the wind that has been bugging me for the last
week had stopped.
Delaying the trip to town I piled into Rustpuppy and blasted down
the old road to get some runs in.. I was eager and didn’t do much warmup messing
about.. I did do a dismal
0-60 at 5.73 seconds..
The bog was still pronounced and much time was spent waiting for it to
end.. The
highway looked clear..
I motored to the southbound launch area and got ready..
I was so eager I kept botching the level on the G-Tech and wasting
time.. Before I got my stuff together (the word I am thinking as I write this
is not stuff) an oncoming car appeared..
Damn.. I hoped to salvage
the run so I started motoring slowly south waiting for the oncoming car to
pass.. He finally did but I found myself on an area of Rustpuppy run that had
never been used as a launch area..
Not knowing what to expect I went ahead with the run.. The Drag Radials grabbed the road
and there was no wheelspin at all, no second gear chirp either.. Most excellent
traction.. I stayed on
it past the end of the quarter mile (I was so stoked that I went clear to 6000
rpm in 3rd) and probably was going about 119-120 when I let off..
But.
Due to the excellent traction and the low converter stall the time
was only average at 13.55@107.6.. Since the last few days
have been the only decent weather we had since last fall, every camper, RV, motor home, and old
car with stuff tied on top have been on the road.. Since I need about a mile of traffic free
highway it is almost impossible to make a run.. I went out on attempted runs about 3 or 4
times since and always was blocked..
I decided that the best solution for the above issues is to have
patience, redo the battery box in the trunk, get the cutouts installed, get the
aviation gas.. And take my
time about this stuff..
Also it is nuts for me to be running around on the highway without
a spare or a jack..
I messed around with the scale again and came up with this package that
must go back into the trunk.
See t&159-1.jpg..

A small floor jack, cross wrench, and the 40 lb spare.. The bumper jack would not be much
good on the front since Rustpuppy has no front bumper mounted..
The
floor jack weighs 31 lbs
the
cross wrench weights 4 lbs
the
spare weighs 40 lbs
and
the jumper cables weigh 7 lbs..
This means that I must put back 82 lbs of trunk junk.. Goody just needs more
horsepower..
More to come..
Rick
Draganowski
(lost
in the vacation zone)
Subject: [nova] Rustpuppy
Test&Tune 160
Date: Wednesday,
May 28, 2003 10:04 AM
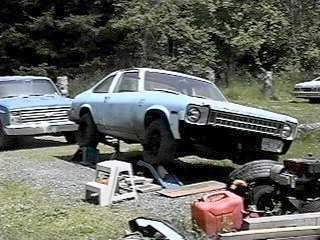
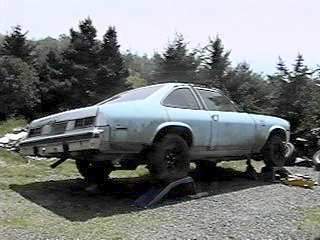
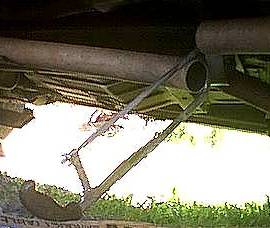
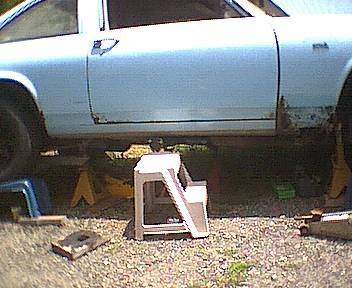
Rustpuppy
has been jacked up awaiting the
cutout installation for a week
now.
(see t&160-1a.jpg and t&160-2a.jpg (note sturdy jackstands))
The weather finally cleared up and is going to continue to be
good.. So
the
story continues.. So far this
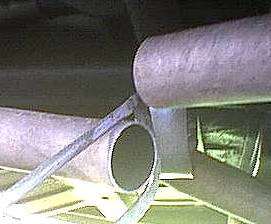
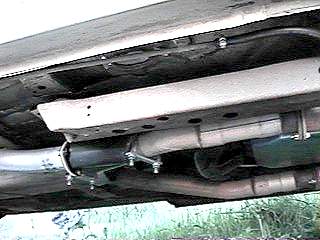
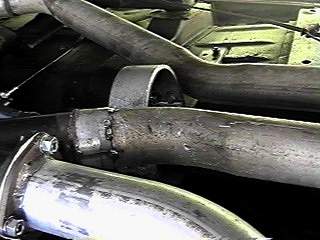
project has been a comedy of errors, or at least poor planning. I suspended the right
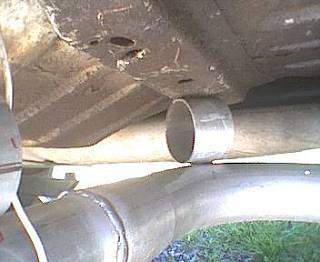
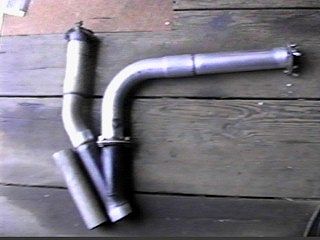
cutoff directly under and touching the location that it will be spliced into
the existing exhaust system.
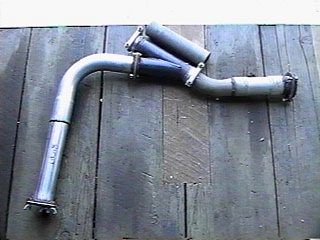
See t&160-3b.jpg and t&160-4c.jpg.
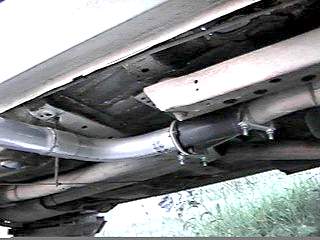
Then
using short pieces of 2 ½” exhaust tubing I did a survey of possible problems
with the location. Naturally
there was one. And serious
too.. Not actually interfering
with the location but ending up solidly against the top of the cutout was the
hat section underseat brace..
It is always something.
See t&160-5c.jpg and t&160-6a.jpg.
My first
instinct to fix this was to cut the brace out (and the one on the other
side).. I thought about
using the air powered cutoff tool.
(see t&160-7a.jpg, think oversized Dremel with over one horsepower..
)
I put
the project on hold to attend to some needed outdoor work on the
property.. Like all my
projects I thought about it while doing other more routine things.. The more I thought the more
the solution stank.. The major
flaws were this.
First, this brace is an important part of the
unit body and removing it would not be a good thing.
Second,
it would take an enormous amount of time and trouble to grind those thick tough
pieces of steel out of there..
And
third, I bought my air compressor in 1980 and has been online cycling
since.. (due to small leaks
it comes on about once or twice an hour)
This puts
it considerably past the end of it’s useful life. It has
So I had
to come up with an alternate solution.
The
first alternate solution was to modify the cutout assemblies to put a jog in it
to avoid the braces. After a day
of consideration and thought this idea started to stink as well..
First,
it would involve modifying my beautiful cutouts.. Cutting them up and gobbing welds on them
really got on my nerves.. I don’t
know if I could make myself clamp them in the Dewalt chopsaw and have at them..
Second,
the changes needed would compromise flow. Not much but enough to be discouraging..
Like a
dead fish in the noonday sun, the more time went by the bigger the stink.. I had to come up with a
reasonable third solution.
Yesterday
I lay on the cardboard under Rustpuppy and tried to clear my mind of
preconceptions. I noticed the good
job Tim had done on the exhaust system. He had tucked it up as high as possible as is
his style. It was well above
the bottom of the subframe..
Then the
idea I should have started with came to me.. Since I was cutting each exhaust in two places
It would be easy to rotate the parts to lower the area that the cutouts splice
into a half inch. And that
was all the clearance I was looking for.. Simple and probably would have happened automatically
if I had not measured and tested.. The bad assumption I had started with was that
the existing route of the exhaust pipe would remain after modification.
This is
a good outcome. Today
I will practice my Sawzall metal tubing cutting techniques (tricky with a
single speed saw, I may just saw
them out with a manual hacksaw) and get started again..
More to
come.
Rick
Draganowski
(sometimes
less is more)
Subject: Rustpuppy Test&Tune 161
Date: Monday,
June 02, 2003 9:19 AM
Naturally
now that the weather has finally cleared up and I can take care of all of the
backed up projects Chuck drops a bombshell on me on the 30th of May.
An
invitation to meet him at Woodburn (by Portland) for some racing.. On the 29th of
June.. So now I got a
deadline.. I am
worried that scheduling for surgery may interfere but I am planning on being
there. (276 miles)
So
Rustpuppy has to be brought up to NHRA standards... Easier said than done.. I am juggling so many projects
that I lose track of too many things.. My short-term memory is fading fast so I am
always looking for something I just had and set down somewhere. Back to Rustpuppy. Chuck and the rulebook sez
that no more than three
This
boggles my mind as a stock disco Nova has three pieces of rubber hose and this
is their lengths from the factory.
Tank pickup
to rear subframe/body-- - 7”
Rear
subframe/body to front subframe- 9”
Front
subframe to fuel pump--------------10”
This is
a total of 26” of rubber tubing from the factory.
Back to
Rustpuppy again. When I was
out measuring the rubber lines. (you know how I am about details) I noticed
that the rear one that goes to the tank pickup had deteriorated since the last
time I inspected it. Everything is
slipping away from me..
It was obviously leaking and I bet
I took pictures of the other two pieces of stock rubber fuel
line. See
I swear that the last time I
inspected the rear one it looked just like the middle one. And I noticed that the fuel
line is corroding in the area right in the wheelwell which has direct exposure
to the ocean.
I spent
what seems like hours getting the old hose off.. It had to be cut

This picture was taken
with
pictures.
And the pictures are pretty good for a 60 buck camera..
If I
thought taking the old hose off was trouble putting the new one on was

I have decided to replace the center hose as well.. I cut it in
preparation for removal and it was piddling gasoline.. I tied the ends
down
pointing to the drip bucket and decided that I had enough of groveling on the
ground struggling..
Tomorrow is another day.
I went
back to the project of fine tuning the wheel alignment of the Suburban.. That found me groveling in a
different place.. Sigh..
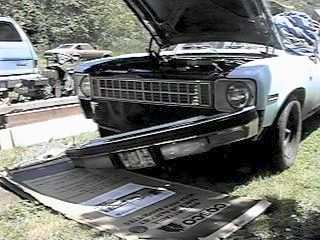
Finally I went back to the ramp project and at least got a little done
on it..
More to
come..
Rick
Draganowski
Subject: Rustpuppy Test&Tune 162
Date: Wednesday,
June 04, 2003 9:44 PM
A whole
lot of good stuff happened yesterday.. I took the leaking hardline with me to NAPA and was
asking the young people with good eyesight to look at it and tell me if they
could see a defect.. They
sure could. There was a pit
in the seat right at the weld line of the tubing and it had corroded
through.. It dripped
pretty good when Goody was running on the test stand.. (scary business when you are running an
engine indoors on a wooden barnboard floor..)
Anyway I
told of my plan to go back to a totally stock fuel line system.. I bought a filter that fits in the
Q-Jet (after testing the amount of restriction, surprisingly small) Got a couple of new filter
springs as I have lost track of the one I took out of Goody’s carb. I also picked up a couple of
those neat nylon gaskets that seal the filter chamber cover/fuel line
adaptor.. That gasket is damn
important if you are running a Q-Jet..
I also
picked up a 30” length of pre-flared 3/8th steel line to provide
backup if all else fails..
But I dread having to bend it to fit.. For me, it is more than a day’s work..
Then the
excellently good stuff started happening.. Archie Aldrich came in for some stuff.. It has been many months since I saw
him. Archie is the racer’s
racer and the finest drag race car builder/mechanic/driver that I have ever
met.. He actually has
sponsors and makes money drag racing..
Can you believe that?
I told
him of the possible road trip to Woodburn and my problems and questions.. Archie has run at Woodburn
innumerable times and is familiar with their inspection system and attitude
about us cheapjack Sportsman class goobers..
Archie
had answers to practically all my questions and took a load of doubts off my
mind.. Archie said as long
as the stock fuel line system was in good condition they are not concerned
about the intake run from the fuel pump to the gas tank.. I showed him the pictures of
Rustpuppy’s fuel system and he said that the run from the pump to the
carburetor was critical and was inspected.. No goobered up rubber line like I am running now. I told Archie of my plan of going
back to the stock hardline and he said that was all that Rustpuppy needed in
this area to run at Woodburn..
That
morning I had replaced the last old piece of rubber tubing in the inlet
line. The one from the front
subframe to the rear subframe/body assembly.. See t&t162-1a.jpg for it’s status now.
Then
Archie told me about what he had been up to.. He has sold the Monte Carlo and got rid of his
hot rod pickup.. All for the
most beautiful Chevelle I have ever seen.. And he did the paint and detailing.. And installed a cherry 454 big
block.. What a
beauty.. It looked pretty ratty
when he first got it but now it is ready for a magazine spread..
And in
his spare time he made another car trailer. This one with part of a
Then
more good stuff happened. He asked
if I still had the almost virgin M/T ET Streets he sold me last year.. I had told him that they were too
tall and that I was scared by their squirrelly street manners. Turns out that he needs them for
the big block Chevelle..
So I told him I would run them out to his house that evening..
Then I
went home to my projects..
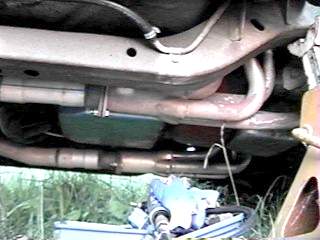
Got a good close-up of the rusty ceramic coated Dynomaxes.. (See
t&t162-2a.jpg)
I had ordered some aluminum header paint from NAPA and I
was planning on cleaning them up and painting the rusty parts..
Then it
was time to crawl under and tend to the exhaust pipe cutting.. It is heavy gauge 304 stainless and
I dreaded the physical pain it would cost.. I have been having a lot of problems with unexplained
premature muscle fatigue, cramping and general malaise lately. (good stuff about this later that
evening)
I had
considered all of the possibilities but it came down to a manual
I swear I was sweating,
aching, and cursing under Rustpuppy
I quit
early due to the effects of the sawing and rassled the ET Streets into the
Suburban to take to Archie later..
Then I
went in for a long break.. I
called Jeg’s and ordered the helmet I need.. Only 99 bux (plus handling and stuff) They have 132 of them in stock and it
will be here on the 11th or 12th so that issue is
covered..
I was
getting so discouraged about the suffering I had just had to pay for that tiny
bit of progress on Rustpuppy that
I got on the internet and went to the medical diagnosis outfit I am signed up
with to try to figure out what was going wrong with me.. After an hour of research it all
came together.. A bunch of
symptoms I am having matched against the side effects of the medications I am
on combined with a little luck came up with a startling conclusion..
Unbelievably
I had Hyponatremia.. A
shortage of salt (sodium chloride) in my blood.. Damn..
The diet I am on combined with the medications and the warm sweaty
weather was depleting the salt in my system. This is serious shit, as it can cause your brain to
swell and be damaged, It can make you nuts, and you could die from it..
The
solution was simple, just add to my diet some of the salty foods that I used to
scarf down by the ton..
This is so weird..
I headed
into town to deliver the tires to Archie (and wound up talking with him for a
couple hours) and afterwards stopped at the grocery store and bought a couple
bags of premium Lay’s kettle chips.. I just had potato chips for dinner than night.. And by this morning most of my
nasty Hyponatremia symptoms had disappeared.. Amazingly good news..
My whole
day today was taken up with a little begging on the Nova list and a medical
roadtrip of a couple hundred miles.. On the way back I stopped and spent the
afternoon with Cathy and Steve, the owners of South Coast Auto Wrecking.. I have known them since
they took over the yard twenty years ago.. It was an enjoyable social event to spend a quiet
afternoon, bench racing, tall story telling, and bringing an old friendship up
to date.. I told Steve my troubles
on the fuel line and he said that he would do his best to come up with
one.. He will
call if he can scrounge one up..
As I mentioned the vast majority of their business has been getting
involved with “popular” cars and trucks. (mini imports mostly) He feels the same way about them as I
do but business is business..
Since this yard has been in operation since the 40’s there are thousands
of tons of old iron that may have lots of wonderful things in it.. I have to get my health in shape
to be able to spend a few days there.. (it would take months to do a through survey of the
stuff) Steve has come
up with an electric golf card for the old geezers like me to use when junkyard
diving.. The yard is narrow,
(about 250 feet wide) but long
(about a half mile) so there is a lot of rough ground walking involved..
Travel
really tires me out and I was amazed to see the cold salt fog had arrived at
home before I did.. No work today,
but a bit of time spent on the list..
Then
another good thing happened..
I can’t believe what a great couple of days I have had.. This has to do with the battery
cut-off switch.. I have the
20 buck switch from Jeg’s and the battery cable and terminals I need. Hell, I bought them a couple
years ago knowing I would need them..
But as far
as the alternator cutoff besides running the BATT terminal wire
when
racing.. Every
little bit helps..
It eventually sank into my
The
Tomorrow
is another day..
More to
come.
Rick
Draganowski
(good things
are happening)
Subject: Rustpuppy Test&Tune 163
Date: Saturday,
June 07, 2003 9:41 AM
As you
know from my whining the strange “coast effect” has been fouling up my weather. It has been cold and foggy with some light rain.. The weather service insists
that it is sunny and over 70 here.. Yeah, right.
I waited
patiently until yesterday afternoon hoping that the sun would show up.. But it didn’t. This picture
(MissingMountain.jpg) was taken about 2pm..
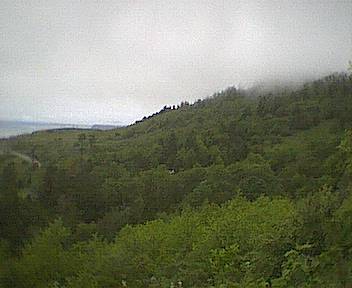
Note that almost all of Humbug mountain is missing (see regular picture from this spot, Mountain.jpg)..
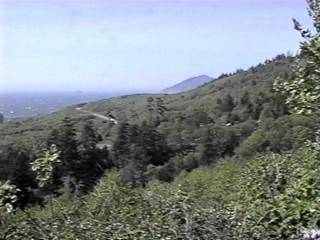
I live
on the property in the approximate middle of the first picture. You can see the blue roof of the
Unit. The maritime fogbank
had lifted a few hundred feet but it was still cold and wet.. I stayed in and
took it easy..
Then a stroke of good news from Steve at South Coast Auto
Wrecking.. He
found a good looking fuel line in a cardboard box in their
shop! I went
and
fetched it and noticed that it was all greasy with no external rust at
all.. It looks like my
problems are solved!
But.
Closer
examination showed a large
corrosion pit in the end that goes into the fuel pump.. It looks like it is almost
as wide as the seat and turns this nice fuel line into junk.. See photomicrograph
t&163-1.jpg.
Sigh..
Hoping
to get something done this afternoon..
More to
come.
Rick
Draganowski
(laid
around and goofed off all day, went to bed early, and then woke up in the
middle of the night with another damn migraine headache.. )
Subject: Rustpuppy Test&Tune 164
Date: Tuesday,
June 24, 2003 9:25 AM
Due to
the press of events (including killing my back) I have been long delayed in
getting this report out.
I first jacked Rustpuppy up for the right cutout installation on the 21st
of May.. Over a month
ago.
Just
before that I did some testing on Rustpuppy. The wind was way to rowdy for a Rustpuppy Run with
random gusts of about 40 mph from the sea. But I could fool around on the back road (old Oregon 9)
I did
some testing of the shift points and here is the data.
1-2 shift 48
mph - RPM drops to 3100
2-3 shift 78
mpg - RPM drops to 3800
These
are most excellent for the Goody’s torque curve and provides the nice strong
pull in third gear.
I still
have to contend with the extra traction of the Drag Radials pulling the launch
rpm down to 2600-2700..
That Break-A-Way TCI converter is just not a good match for Goody with
good traction.. Bah.. It is always something.
I did a
launch G-Force next and got the fair reading of 0.78G. With a little bit of
wheelspin and the ET Streets Rustpuppy has hit 0.9G so you can see how much the
converter is costing..
Then it
was on to back-to-back 0-60 runs.. First one had the excellent time of 4.71
sec. Second one was 4.70
seconds.
I think
I have figured out the exact moment I blew the disk in my thoracic spine. Naturally it is all my
fault. It happened on the 4th
of June. And it was hacksawing the
tough stainless steel exhaust pipe under Rustpuppy that done it. It came to me suddenly the
other day when I cut the stainless pipe with my 14” DeWalt chopsaw. I noticed that it was struggling
to get through the cut and was
really laboring. I brought
back the miserable hours I had under Rustpuppy with a hacksaw. Here are the details.
I was
laying on my right side.
Since I couldn’t use my elbow to support raising the upper part of my
trunk I was bending my spine into a U-shape to the left and holding myself up
just by the back muscles on the left side.
Then in
this unusual posture I operated the hacksaw. This involved twisting my upper body to the left and
back again as the saw bit into the
tough stainless. The
combination of heavy bending to the left and twisting did it.. The top one of my
stack of 7 bad disks couldn’t take the strain and ruptured. As the thick viscous core
pushed out through the split the pressure on the nerve roots slowly increased
over the next several days.
By the ninth of June it was as bad as it was going to get and I was
really in trouble with this one.
Since those nerve roots feed abdominal organs and my breathing reflex if
they were severed I would have to be on a respirator or die. So my chances would be
nil. As my disk contents
move down into the spinal canal and are slowly reabsorbed the pain and other
symptoms started easing.
So by now it is about 70 to 80 percent reduced from the peak. I expect with another month
of conservative treatment I will be totally out of the woods on this one.. But I am getting sick of lying
in bed when I should be working.
The most
difficult part of this episode was missing Woodburn racing with the noble Chuck
Butcher.. I wanted to
whip his ass so bad.
Since his Nova is not running correctly I had a chance..
I have
been stuck with relatively trivial low impact work while I recover and as a
result progress is at a snail’s pace. And I get so tired so quickly from the effects
of the stress of the injury I am almost ashamed at how long it takes me to do
anything. I have to
take an hour break in bed about
3-4 times each day and that really cuts into production.
I ran into
Archie Aldrich during one of my quests for steel fuel lines, at NAPA
naturally. I talked
with him some more about racing at Coos Bay International Speedway (only about
60 miles away) and he seemed very eager and helpful. He is getting his Chevelle in shape for some
bracket racing and would like to have me along with old Rustpuppy. (maybe to make his
beautiful Chevelle look better?)
When I get back in shape and can whip Rustpuppy into NHRA spec I will
swap the street tires on and commute to the racecourse..
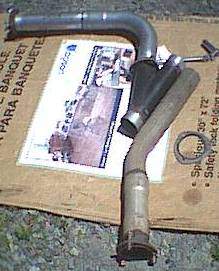
At the end
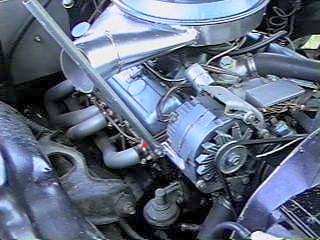
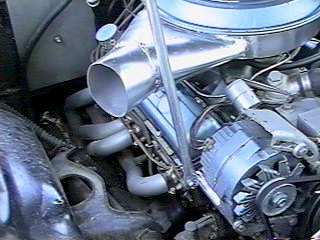
of one of my long days I took a hurried picture of the assembled header back
assembly of the right cutout.
See t&164-duh.jpg.
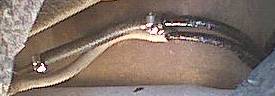
That evening when I captured the picture for this report it just didn’t look right. I was so tired it took me a few minutes to figure out what was wrong. There were only two ways of assembling it so naturally I did it wrong.. (blame the engineer for assembly issues?) See t&164-3.jpg for the correct assembly.
Obvious errors are always the most fun.. Duh..
Next day
I was taking it easy and all I did the whole blessed day was wash Rustpuppy’s
right side (the one that faces the sea) and her rump.. You can see from the before
shot (t&164-4.jpg) that Rustpuppy was a dirty dog..
After shots
looked much better. See
t&164-5.jpg and t&164-6.jpg.

Finally
I spent a whole day wrestling around under Rustpuppy getting the first trial
fitting of the right cutout.
(See results in t&164-7a.jpg)
So far it looks like it will work out exactly as
designed.. That is a
relief..
More to
come.
Rick
Draganowski
(low impact
working is my thing)
Subject: Rustpuppy Test&Tune 165
Date: Wednesday,
July 02, 2003 7:27 AM
Things
are still slow here.
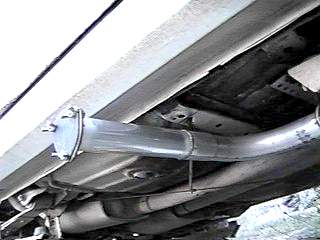
The day after I got the right side cutout fitted (I thought) I made one
little adjustment to the angle of the tailpipe and the front joint (which I
thought was secure) fell apart.
Damn, I
wrestled with it for about 2 hours putting it together. (nothing ever fits exactly right) But finally using my brains instead of
my strength I really did get it fitted together. And the unruly joint that kept falling apart despite
the clamp was secured with a sheet metal screw.
Here is
a panorama of the current situation.
See t&165-2.jpg, t&165-3.jpg, t&165-4.jpg, and
t&164-5.jpg. You can see
how it is coming together.
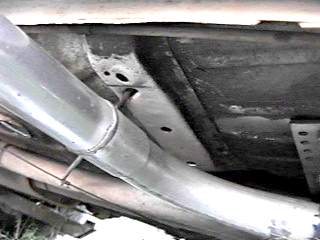
The body
reinforcement channel I thought was going to give me trouble turned out not to
be an issue. Even the stock
rod that holds the parking brake cable could be used. There is a minimum of ½” clearance on all close
points. Looks good to
me. See t&165-6.jpg...
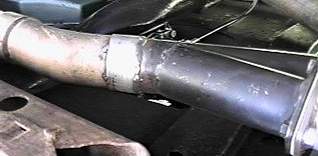
The exit
to the cutout is in more of a straight line with the headers than the original
exhaust pipe so I love the way it looks. See t&165-d.jpg.
Since
then, I have been taking care of numerous details unrelated to the cutouts
including swamping out my shop so my attitude about the place would
improve. Tripping over
stuff slows me down. And
makes me feel stupid..
I have
been practicing welding (MIG) on a mockup of the system. I want to make several secure
short (about ½”) welds on the joints to hold them together till I get the Pup
to town and have Harding weld them on properly. You need a lift to do this right.. (and he is about a million times better at welding than me)
Getting
the shop organized (at least the front 20 feet of it) is the next big project
and then it is on to the left side cutout installation..
Much
more to come.
Rick Draganowski
(there
are always hundreds of things going on that would make these reports into
novels if I included them)
Subject: Knocker
Date: Thursday,
July 03, 2003 8:36 AM
I
started out with some more organization of my shop yesterday, then when I got tired I sat down to do
some more practice welds in preparation for the under Rustpuppy welding.
I
started out cobbling up a jig to be able to simulate welding something higher
than my head. I
noticed that my welding on the jig was absolute crap.. I puzzled over it for a few
minutes and then realized that having the big door in my shop open was letting
enough of the miserable wind in to disrupt the shield gas. You need still air to MIG
or TIG weld.. Damn. It is the windy time of the year with
30-40 mph gusts all day, every day, and even at night.. Sigh.. It is always something.
Looks
like I am going to enclose Rustpuppy in a tent to get this little job
done.. More work for the old
fart.
I didn’t
want to shut up the shop for practice welding since it was such a beautiful
day. So I did a little more
organizing and cleaning of the shop and suddenly decided to do something with
Knocker. She has been
sitting neglected under a tarp and ignored since July of 2000.. I can’t believe it has been three
years.. How time slips away..
I
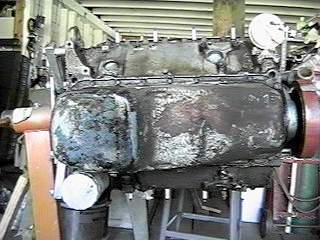
uncovered her and wiped off a little oily dirt. See k-1a.jpg and k-2a.jpg.
This
fine motor has given me so much real service. She started life as a replacement motor for my old 77 white
truck installed in 1979.. I
and the west Texas previous owner pretty much used up the original motor. (I donated it to a local
rodder in Los Angeles)
I can
remember so many trips and so many abuses for so many years of this motor. One memory is blazing
through the Mojave heading to Texas at over 100 mph at 2:00AM listening to some fine Mexican Rock on
a clear channel Mexican station. Dragging the Airstream from
Dallas to Gold Beach with a year interlude in the mountains at Frazier Park
California. (up the
Grapevine and to the west a little)
She took
me with the 1000 lb camper on her bed and flat towing the 3800 lb VW Westphalia
Camper on the 800 mile commute to Los Angeles from here so many times that I
have lost count.. 8 or
10 I think.. And I wasn’t
gentle with her..
Then she
sat for three years after the white truck was junked (the driver’s door fell
off).. Some
Marvel Mystery Oil and a little work and she was powering Rustpuppy at the
beginning of her development into a race car.. With stock exhaust manifolds and cam and intake manifold she
powered Rustpuppy to 16.4@87mph on the G-Tech.
Later
with the Edelbrock Performer cam and intake manifold and some Flowtech headers
she pushed old Rustpuppy to 15.02@97.7mph
. That was with a 3.08 axle
and a stock truck TH350 with a 4200 rpm 1-2 and 4800 rpm 2-3 shift.
Then
when I changed the governor to shift at 5400 she started knocking.. It was a sad December..
The following was written on Monday, December 20, 1999 at 11:53
AM.
When the original cam in the Target
Master motor was destroying itself some of the bits of cast iron and steel
(tiny but important) found their way to the connecting rod bearings. Due to the luck of the assembly
roulette one rod had smaller clearances than the others. This rod (we will call it Gomer because
it is a misfit) as a result of it’s tight clearances would run hotter than the
others and was more likely to have minor metal to metal contacts during high
rpm operation. The metal to metal
contacts combined with the tiny bits of metal caused the bits to embed in the
bearing material of Gomer pushing up the surrounding metal and decreasing the
clearance more. Gomer’s bearing
would get hotter, more metal to metal contact, more bits embedded, less
clearance, more heat, etc.
Naturally the motor kept going so
the bearing material which seized was wiped out opening up the clearance. Since I caught the disaster and nipped
it in the bud by instantly getting off the throttle and featherfooting it back
home the knocking is at a level which is confusing. My past experiences have been more drastic and serious due
to the driver staying on the throttle until the knock was really bad..
That is
when I first started calling her “Knocker”.. Her real name is Cynthia.. A tribute to the Goddess of
Work. http://www.goddess-athena.org/Museum/Temples/Delos/index.htm
Hephaestus and Athena were always my favorites from Greek mythology..
I spent
some time examining her.
Note the clean internals..
See k-6a.jpg..
Then I
started paying attention to her cylinder heads.. Interesting to note that the ports were nicely
done and much better than I expected.
See k-7a.jpg and k-8a.jpg..

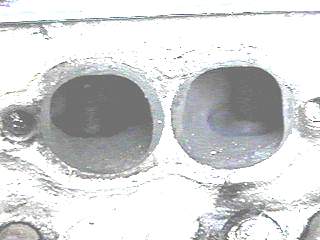
It is
dark in there and difficult to get a decent picture. But take my word for it, with bigger valves and a
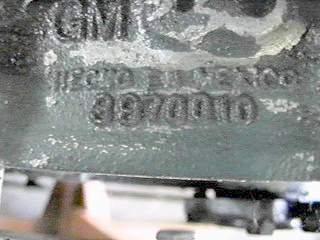
little port work and milling there is way over 350 horses in them. And they are that fine
grained high nickel Mexican premium cast iron.. It does say Hecho en Mexico on Cynthia. See k-4a.jpg.
At this
point I decided to stop using the uncomplimentary nickname of “Knocker” and go
back to her proper name of Cynthia..
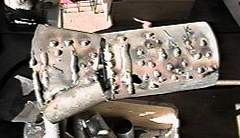
I then
carefully rotated the engine stand to present the pan for removal and the
internal inspection to begin. Only
3 years late.. How slow I
work.. It took an hour and a lot
of muscle to safely rotate Cynthia due to the poor design and rusty bearings of
the cheapie Harbor Freight engine stand. See k-3a.jpg.
By then
I was plum tuckered out and ready for dinner and early bedtime. I have been getting up between 3
and 5 am and getting to bed at 7 to 9 pm.. Early to bed and early to rise was always my style before I
got caught up in the years of the miserable black hole of clinical depression.. Modern medicine is a
marvel...
Today
Cynthia’s knocking mystery should be solved as the pan comes off and it is time
to inspect the bearings..
More to
come.
Rick
Draganowski
(In the
Norse pantheon I think Loki is cool)
Subject: Rustpuppy Test&Tune 166
Date: Saturday,
July 05, 2003 4:31 AM
Up
early, (up early every day in the
summer) and out before 8am to see if
and then it was time to wrestle my old 175 amp 230 volt
Italian MIG welder out to where Rustpuppy was.. See t&166-2a.jpg.
By the
time I managed this in my slow and careful way the wind has started,
Then I
ground off the worse of the mess. (no pictures of that horrible mess) You can
see the outer joints are a lot better since I didn’t have to be under them when
they were done. See
t&166-4a.jpg, t&166-5a.jpg, t&166-6a.jpg, and t&166-7a.jpg.
There was
a little problem with the tiny breeze but I found that it was only in gentle
gusts with still periods between.
Now it
is time to get poor Rustpuppy down from those ramps and jackstands were she has
been since the 21st of May. Damn, it takes me a long time to get little things
done.. And naturally
she goes back up on the ramps and stands but on the other side.
I will
jack Rustpuppy up on the side away from the ocean so I could block the wind by
just leaning plywood against her windward side. If I had a brain I would have done the passenger’s
side that way.
I hope
it don’t take 6 weeks..
Sigh..
Then It
was time to address the issues of Cynthia and Gomer.. (BTW a Gomer is the vessel or bowl that catches the blood
from animal sacrifices in the early years of Jewish religious tradition.)
More to
come.
Rick
Draganowski
(slow but
unsteady)
Subject: Cynthia and Gomer
Date: Thursday,
July 03, 2003 4:09 PM
We left
off the story with Cynthia on her side ready to have her pan removed. About 9 this morning it was
done. I gasped at the beauty
of Cynthia’s underside. It looked
way better in there than I was expecting.
See cyn-1a.jpg, cyn-2a.jpg, cyn3a.jpg, and cyn4a.jpg..
The Edelbrock cam looked like jewelry and it was so clean
and pretty. You could see no
wear or marks on the piston skirt that was exposed. (minor thrust face of #2)
But now
I digress, and we go back to a time long ago..
So based
on this old theory I put on my leather gauntlets and went on a search for
Gomer. It didn’t take
long. Gomer was there, with
a big end clearance worse than I expected, but with no signs of
overheating.. It was number 5
rod. All the others were fine..
At first
I just made a tiny mark on Gomer and the crankshaft and then pushed to the
other extreme of the play.
See cyn-5a.jpg and cyn-6a.jpg..
It looked like a hell of a lot to me. Over a millimeter.. I couldn’t hold myself back and within a few minutes had the dial indicator set up on Gomer
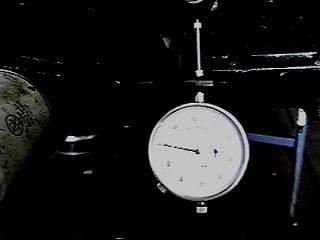
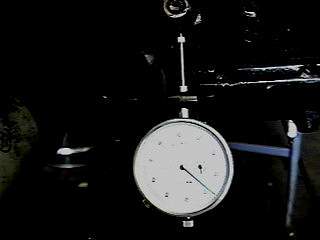
. You can see
the clearance is about 0.043.. That is a bunch.. (the dial indicator face was seriously overexposed so the
pictures turned out crappy.)
By then
it was close to noon and I felt exhausted.. I had spent an hour or so first thing farting around
with the tack welding overhead practice.
I was encouraged that the wind was died down enough for good MIG work
indoors with the big door open.
But by the time I finished the practice the wind outside had picked back
up to the excessive normal..
Sigh.
Tomorrow
we see Gomer’s bearing and crank journal..
More to
come..
Rick Draganowski
(not very
productive, but I keep plugging away..)
Subject: Cynthia and Gomer Report 2
Date: Saturday,
July 05, 2003 3:24 AM
Started
early as I was eager to get some work done and I was feeling pretty good. First I spent most of the morning
on Rustpuppy. (written up in
Test&Tune 166) And then it was time to open up Gomer. Here you see the stage set
with the nuts almost off.
See cyn-13a.jpg.
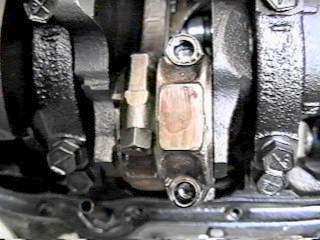
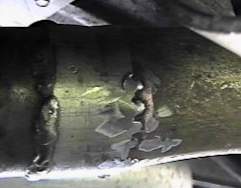
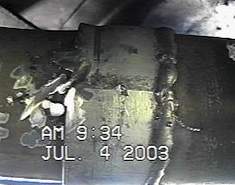
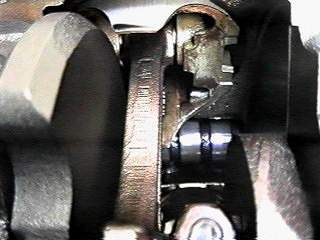
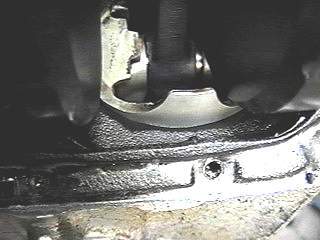
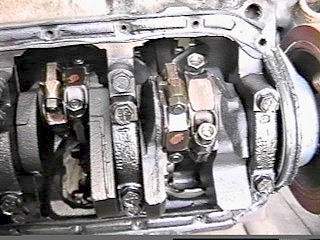
Then with the cap off I was surprised to see that the bearing in Gomer had spun. You are actually looking at the back of the bearing insert, not the crank journal. And the rod cap is sans bearing and shows serious wear..
See cyn-14a.jpg, cyn-15a.jpg, and cyn-16a,jpg..

A truly ugly
sight. I am amazed at
how little this thing knocked.
After
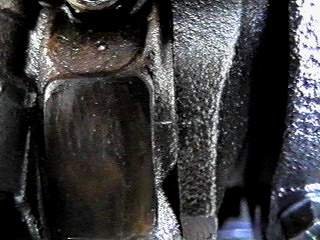
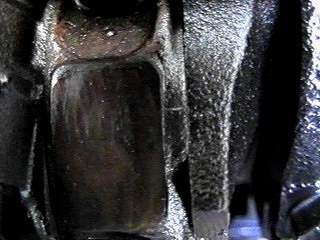
that inspection and photo shoot I decided to take another tour looking for
loose rods. Nothing like
Gomer showed up but there was about twice normal play in number 1 rod big
end. I call this one
Goober, Gomer’s little brother.
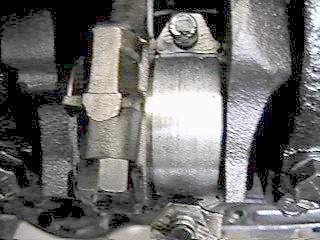
Opening Goober up showed a more normal bearing issue with metal embedded
and scoring that we have all seen before.
The rod journal looked pretty good compared with the one that welded
itself to Gomer’s bearing.
See
cyn-17a.jpg, cyn-18a.jpg, cyn-19a.jpg, and cyn-20a.jpg
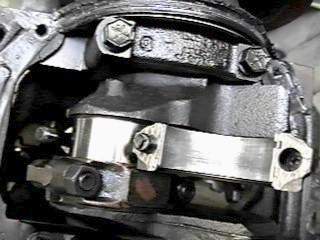


He was following in his brother’s footsteps and would have
welded and spun as well..
The whole
point of this story is that even though I knew better I went ahead and swapped
cams and kept racing with Cynthia after she flattened her stock cam so
badly. I knew at some
level that it was a mistake but I was in a hurry and took the risk. Ha! If the
crankshaft and rod are beyond fixing it is an expensive error of judgment. In a word.. Duh..
If the
crank is shot it gives me an incentive to upgrade Cynthia to 383 status.. Hmm.. It could work out nicely.. But that is for the misty
reaches of the future.
Subject: Cynthia and Gomer Report 3
Date: Sunday,
July 06, 2003 5:53 AM
This
will probably be the last report on Cynthia for a while. There will be a long pause
(I hope not another 3 years) while I concentrate on Rustpuppy and the shop
project. Also I may be
picking up another contract job and that will tie me down with the miserable
business of work for a few months.
With the new laptop it will be a pleasure compared to sitting at the big
computer and having problems with my blood circulation..
Back to
Cynthia and Gomer. I brought
the bearing shells and the rod cap into my office/lab/bedroom for
photomicrographic analysis yesterday. Here are the pictures.

This is
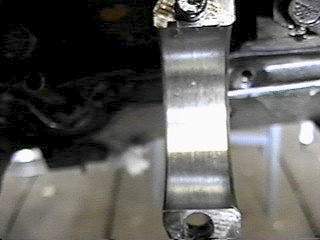
the outside of the steel bearing shell. It was spinning in the rod so there are a few
scratches.
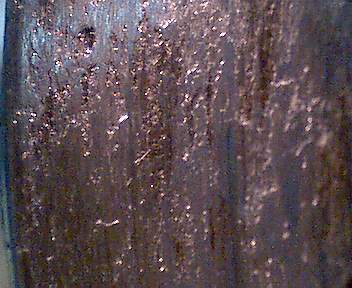
This is
the inside of the bearing shell.
It looks pretty nasty.
The surface of the crankpin it was welded to looks damn nasty as well..
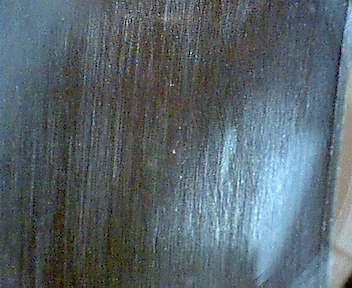
This is
the quality steel bearing cap.
It held up best. But
this is still unreasonable abuse.
I am not sure it will clean up if resized.
And
finally a macro shot of the parts in the photomicrographs to give you a scale
indication. This is an
ugly business, but it was my own
fault and I don’t want anyone to make my mistake.
Flattening
a cam is serious business, don’t ever think you can get away with just
replacing the cam and lifters..
Back to
more enjoyable reports as Rustpuppy goes for a ride today. And I am trying to resist the
temptation of opening the one partially-installed (tack welded in) cutout.
More to
come.
Rick
Draganowski
(where would
be a good place to shop for a 383 kit??)
![[ Back Button ]](../gif/t_back.gif)
![[ Go Home Button ]](../gif/t_home.gif)
![[ Next Button ]](../gif/t_next.gif)