Subject: Return of Rustpuppy report 25
Date: Wednesday,
July 05, 2000 9:16 PM
Slow and
painful maybe, but some progress was made today. Another dirt in the eyes day as I discovered that the passengers
side header could come out before pulling the starter first. (that is really a chore and I didn’t
want to do it) If the Nova is high
enough the header can go down with a twisting motion toward the centerline of
the car and plop out the bottom.
With that done it was an easy task to disconnect the battery cable (long
guy from the trunk) and the other wires so the starter could come out quick and
easy. And out it came..
I
planned on pulling the transmission cooling lines cause they stick out too far
forward and will foul on the front radiator/fender crossmember. I had all that and the front fenders
off at the time of installation of the motor so I had put the lines into the
transmission when the motor was out.
I found today that It is impossible to remove the lines with the
transmission at the normal location with the proper tubing wrench. I had a brief vision of using vicegrips
on them but that is too nasty for even me.. I may leave the lines and bend them just enough to snake
them over the front crossmember (picture frame thingie) during the
removal. Or maybe after I get the
motor/transmission assembly unbolted and suspended on the hoist I can drop it
enough to get the tubing wrenches on the fittings..
Then I
pulled the crankshaft pulley to allow more forward movement of the motor to
clear the tunnel before hitting the radiator crossmember thingie (what is the
technical name for that thing? I
forgot..)
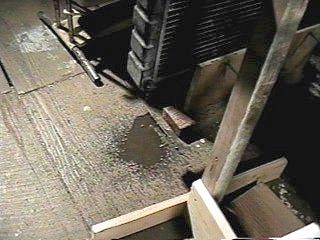
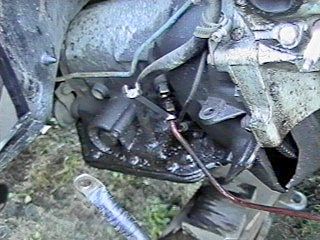
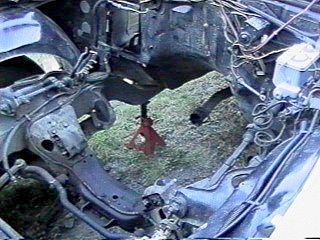
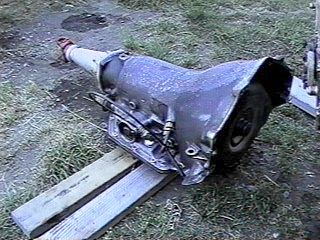
Last on
today’s agenda was the shift linkage.
When I transplanted the salvaged Target Master V8 and TH350 in place of
Rustpuppy’s 250 six and TH200 I found that the TH200 column shift linkage was
not correct for the TH350. I had
to weld a 9/16” extension to the bell crank arm which is driven by the link
from the column arm to get it to work.
See pictures ror25-1.jpg and ror25-2.jpg.

The
shift linkage was out in a jiffy and since it is getting dark by then the Nova
work for today is done..
You know
it is a soothing and therapeutic thing to be able to mess about under old rusty
cars and get dirt in your eyes.
Even though I have had almost zero seat time since last December, just
working on Goody and Rustpuppy seems to keep me going..
More to
come..
Rick
Draganowski
(slow but
sure..)
Subject: Return of Rustpuppy report 26
Date: Friday,
July 07, 2000 9:37 PM
The
first part of this report is a lame excuse for not getting more done on
Rustpuppy’s motor swap. The
Suburban Assault Vehicle started handling in an unpleasant and downright
hazardous (because of my driving style) way a few months ago but I did not take
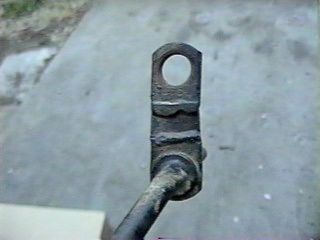
immediate action. The right front
tire going flat a few days ago brought to my attention that the bracket which
secures the anti-roll bar to the lower control arm was broken. (see ror26-1.jpg)

So last
Wednesday when I went to town (the Suburban wallowing in the wind) I checked
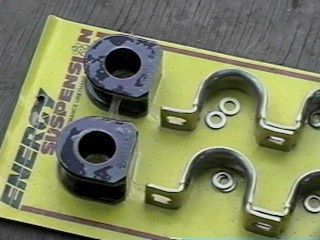
with my local NAPA. Well Tracy
(the fellow who caught Goody in the crate last January when we dropped her off
the loading dock onto the Suburban tailgate) found a package covered with dust
containing brackets and bushings (polygraphite no less) which someone had
ordered a couple of years ago and changed his mind.. I sprang for the 31 bucks (ouch!) and brought
them home.. (see ror26-2.jpg)
So my
crawling around on the ground time today was mostly spent on replacing the
broken bracket and getting the Suburban handling right again. I took the monster for a test drive and
it felt good to be able to enter the corners at excessive speed again. I am springing for two (for now)
BFG Radial T/A Long Trails to replace the cornered off old (circa 92) tires.. I will be putting on the rear two in
six months or so..
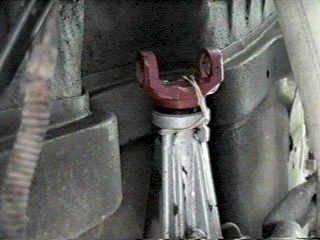
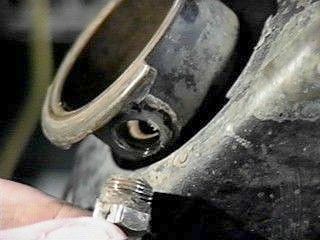
Back on
the Nova front I pulled the front U-Joint trunnion I had plugging the TH200 on
the old six out of Rustpuppy and used it on the TH350 on Rustpuppy after
pulling the driveshaft.. I
fastened it in place with a large rubber band.
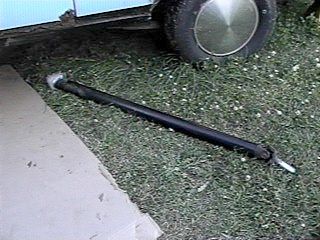
It was a
little annoying since the fluid started pouring out (good for the lawn I tell
you) after the driveshaft fell away and when I put in the plug the tranny fluid
squirted out about 5 feet from the tiny (0.020 or so) hole in the center of
it. (it is a scrounged part and I
don’t remember where it came from)
Rustpuppy’s old driveshaft has no such hole in it.. What is the deal on this?? (see ror26-3.jpg and ror26-4.jpg)
More to
come..
Rick
Draganowski
(been
pretty crippled up this week too..
excuses, excuses..)
Subject: Return of Rustpuppy report 27
Date: Thursday, July
20, 2000 9:34 PM
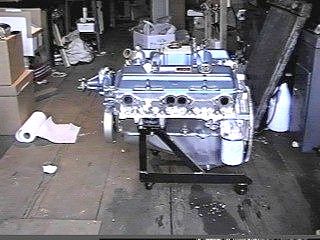
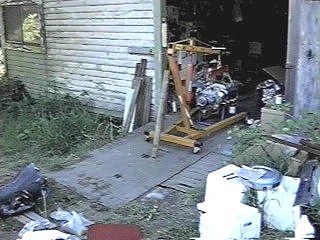
Some
items done on the frantic effort to get Goody safely home in Rustpuppy. Ror27-1,jpg shows the first step in
tearing down the motor test stand.
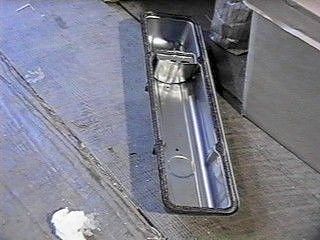
This is the fancy 3-core radiator I found in the Junkyard Dawg and it
has the strangest plastic plug drain valve.. (new to me)
One advantage of my ancient barn/workshop is the ability to just drain
the radiator right on the floor.
(runs between the boards to the earth about 3 feet below)
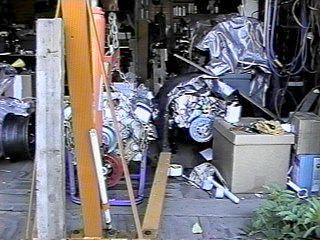
Ror27-2,jpg
shows Goody almost stripped to the level I need for the motor swap and
Rustpuppy outside with Knocker sitting on the floor jack just waiting
patiently.
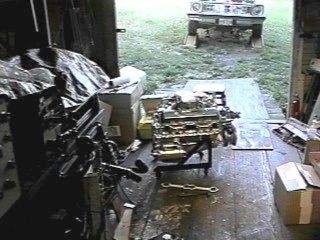
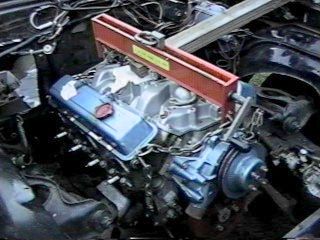
(I been pretty sick so not much is gettin done each day) Ror27-3.jpg is a closer look at the precarious hold Rustpuppy has on the old Target Master motor..

Ror27-4.jpg shows the reason for the floor jack under the
motor. It is the neato tubular
cross member used by the Disco Novas to hold up the rear of the transmission..
Moving
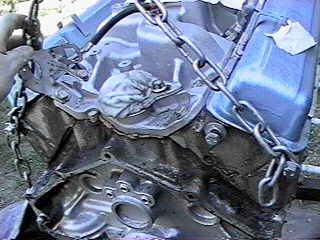
on to the retorqueing of the heads.
I am pretty sure the steel shim gaskets do not need retorqueing but I
went ahead anyway. Using the
El Cheapo (25 bucks I think) Harbor Freight torque wrench I proceeded. Since the head bolts are tiny little ½”
jobs the deep six point 3/8” drive socket fits between the rockers and nothing
needs to be disturbed.
(ror27-5.jpg and ror27-6.jpg)
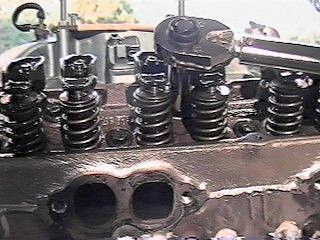
Every one checked out fine at 70 lb ft.. I guess it really wasn’t needed..
I feel better though.. I also retorqued the intake manifold
bolts. I use about 30 lb ft.. Never had one leak.. (just lucky so far...)
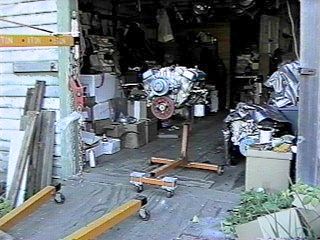
Ror27-7.jpg
shows one of the joys of messing about with a brand new crate motor. See the inside of the rocker cover.. Clean as a whistle.. Them gaskets are the stock
GM cork composite jobs and leak nary a drop (so far..)
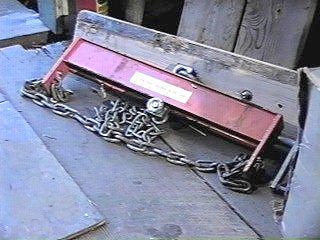
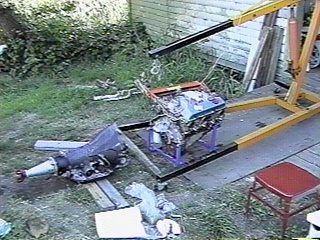
Ror27-8.jpg
shows my Harbor Freight 2 ton load leveler.. This is a cool tool to allow changing the angle of the motor
when you thread it in with the transmission attached. (the only way an ol’ cripple like me can manage
it..) I will be using a 4 point
chain system to flange it onto the motors.. Using 1” bolts in the outer head accessory bolt holes..
This is
a totally irritating development.
I was happily planning to use the 3 core radiator in Rustpuppy with
Goody and found this nasty little brass fitting jammed into the soldered hole
where the overflow pipe belongs.
Now I have to fix this bit of crap.. Anyway I will stay with the skinny 2 core which worked good
in Rustpuppy so far.. (see
ror27-9.jpg)
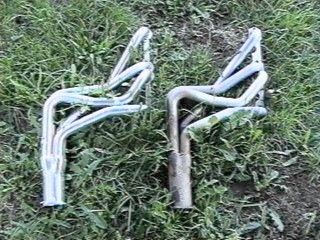
Revoltin
development number two. Notice the
rusty FlowTech passenger’s side header is about 1 ½” longer than the new
DynoMax job. This is going to
cause problems later..
(ror27-10.jpg) Sort of a
day late and 1 ½” short. I will
flange it up with a temporary connection of some kind.. Bah!
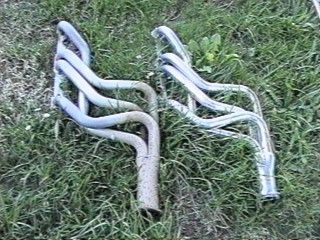
The
driver’s side FlowTech looks exactly the same size as the DynoMax though. (ror27-11.jpg) Go figure... Why can’t there be some
standards?
The last
shot (ror27-12.jpg) is Goody all stripped down and buttoned up and ready for
the swap.
Now if I
could just start feeling a little better..
More to
come..
Rick
Draganowski
(very slow
progress, but progress..)
Subject: Return of Rustpuppy report 28
Date: Sunday,
July 23, 2000 9:40 PM
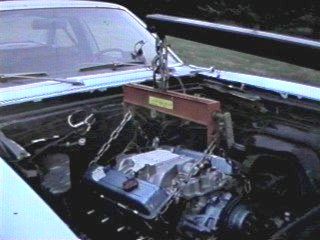
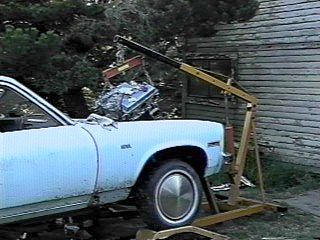
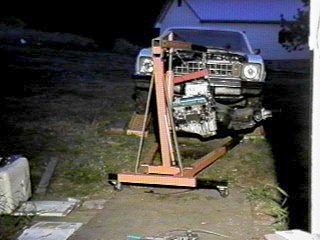
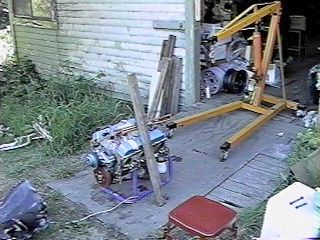
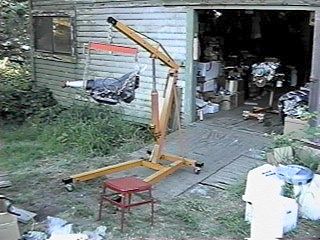
Yesterday
I rassled with the motor lift and got it out in front of Rustpuppy. I am still off my form (heart
arrythmia) and am doing most of the work sitting on my trusty little red
stool.. (see ror28-1.jpg)
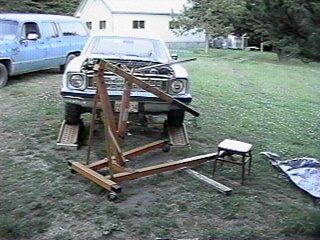
I am
using the balancing thingie (from Harbor Freight) so I extended the lift to the
max to get enough height to clear the radiator mount crossover thingie on the
top of the front picture frame thingie..
(Wish I knew the technical nomenclature for them thingies..) Ror28-2.jpg, ror28-3,jpg,
and ror28-4.jpg. You can see by -3
and -4 that by the time I got the bolts into the heads for the chains fore and
aft and the lift reconfigured I was losing the light..
Tomorrow
is another day..
More to
come...
Rick
Draganowski
(just doing
a teeny bit each day..)
Subject: Return of Rustpuppy report 29
Date: Tuesday,
July 25, 2000 10:59 PM
As I
mentioned before I started feeling really good yesterday and that has
continued. The result is the old
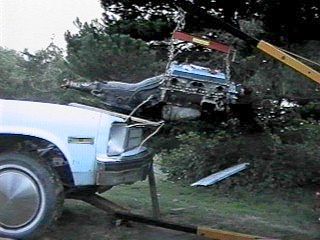
Target Master with the knock is pulled out of Rustpuppy today! I made several pics as I went and it
only took about 2 hours. (sweating lard too).
It is
fun and easy to pull off the cooling lines from the tranny with the motor
pulled out enough to provide top access.. I will never do it any other way..
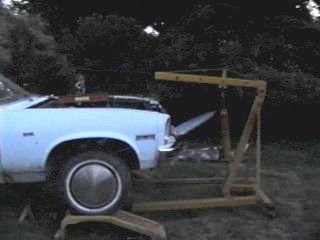
It is
tricky and dangerous getting the motor high enough to clear the core mount top
bar and I am going to make some changes before putting Goody in. (the cross bar was bolted in and GM
decided to save a buck by spot welding it in, It is going back to bolt in.. I am not picking Goody up that
high..)
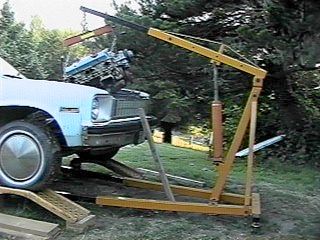
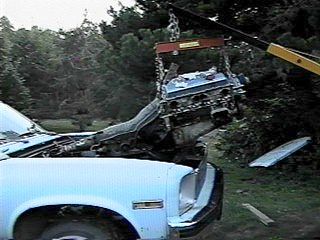

Due to
the uneven ground there was a certain amount of risk getting the motor up high
with the lift sitting at an angle with one wheel off the ground.. The white wire in some of the pics is
to snub the motor to prevent swaying as I pried back the lift with a 2 by 4 an
inch at a time..
I took
my time and made damn sure the center of gravity of the motor/tranny assembly
never moved too far from well within the lift footprint..
It was a
real relief to get the motor down close to the ground..
More to
come...
Rick
Draganowski
(feeling
good again!)
Subject: Return of Rustpuppy report 30
Date: Saturday,
July 29, 2000 11:40 PM
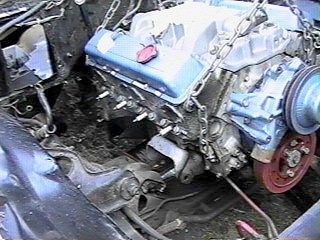
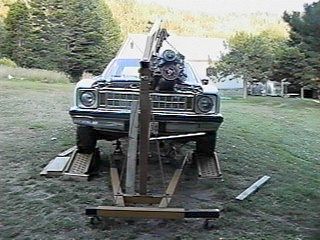
A mixed
bag starting with the knocking Target Master motor out of Rustpuppy parked down
at working level. The TH350
hanging behind is really dirty..
Going to spend some time cleaning it up prior to opening it up for the
shift kit. (Ror30-1.jpg)

The next
two pictures show one of the reasons I am so partial to the Disco Novas. Notice the cavernous engine compartment
and the convenient location of the steering gear. You can see the two 1 ½” holes I made in the crossmember to
allow convenient replacement of the motor mount clams. (ror30-2.jpg and ror30-3.jpg)

Then the
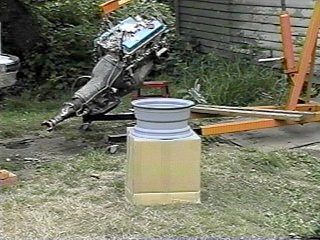
two 7x14 Rallye wheels Eric had promised showed up in UPS. Eric had sandblasted them so I quickly
put a couple of coats of primer on them..
(around here sandblasted stuff rusts in just an hour or so..) This puts me back in a
quandry about the front tires on Rustpuppy. I had made up my mind (what little is left of it) to go with
6x14 rims and bitsy tires for the Big-n-Little look. But now that I have 5 good 7x14 rims and five (at least)
good 6x14 rims I am sliding back to the 245/60-14 size all around.. And putting the 1” anti-roll bar off
the Junkyard Dawg onto Rustpuppy.. I keep going back and forth.. Oh well.. I don’t have to make my mind up for a week or so... I wish I could afford two of each
size.. Hmmm.. Now that is an idea.. (see ror30-4.jpg)
Then it
was back to cleaning, scraping, brushing, scrubbing, washing, steel wooling,
etc. the TH350 to prevent too much backtalk from Buck and McLelland.. It is shaping up.. (see ror30-5.jpg and ror30-6.jpg)
Lastly I
pulled the three little bolts which hold the torque converter to the flexplate
in preparation for pulling the transmission with torque converter off the
motor..
More to
come...
Rick
Draganowski
(getting
dirty..)
Subject: Return of Rustpuppy report 31
Date: Monday,
July 31, 2000 11:17 PM
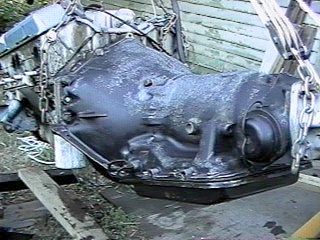
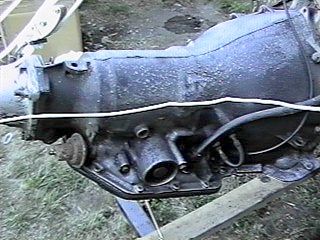
Some
progress today as the “Knocker” made it’s way into the shop for an
autopsy.. First I pulled off
the TH350 (ror31-2.jpg) and the flexplate. The last time I left one on while horsing around with a
loose motor I bent it.
You can
see that the silicone I used during the cam replacement made a fine seal with
the Edelbrock manifold. I used a
¼” bead of the stuff..
(ror31-1.jpg.
I put the “Knocker” onto the cheapo Speedway motor stand so I could move it enough to turn the lift around.. (ror31-3.jpg) You can see the 2x3 I was prying it around with.
I magically shrank the lift next.. (ror31-4.jpg)
After
spinning the lift around I rolled the “Knocker” up to position to place it on
the engine stand. (ror31-5.jpg)
A
symbolic passing took place next as “Knocker” drew alongside “Goody”.. (ror31-6.jpg)
Next you see “Knocker” on the engine stand getting ready
to be wheeled into the operating room for the exploratory operation.
(someday) (ror31-7.jpg)
Last I
turned the lift around again and hooked up the TH350 so I can raise it to a
comfortable working position..
(ror31-8.jpg...)
I was
physically challenged today (but my ticker was good!) so most of the work was
done while ol’ Draganowski was sitting on the little red stool..
Rick
Draganowski
(more to
come.. tranny stuff..)
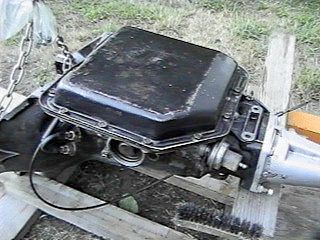
Subject: Return of Rustpuppy report 32
Date: Thursday,
August 03, 2000 10:57 PM
I
finally got the outside of the TH350 clean enough to suit for
dissassembly. (and to keep Ray and
Dave from giving me trouble..
ror32-1.jpg)
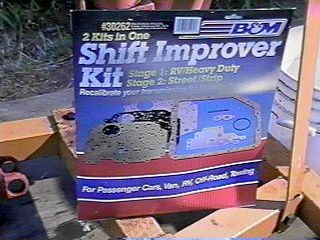
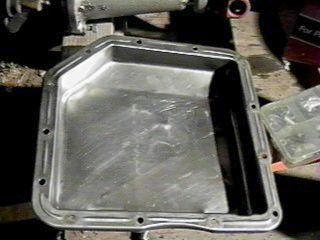
The plan is to install the B&M shift kit. (ror32-2.jpg) The pan bolts were snug
but not tight so the pan looks like new with no bending.
But
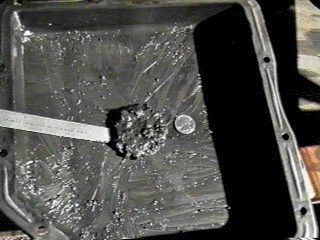
inside was a layer of nasty slimey gray/silver mud. (ror32-3.jpg)..
Not a whole lot, about two tablespoons of the stuff.
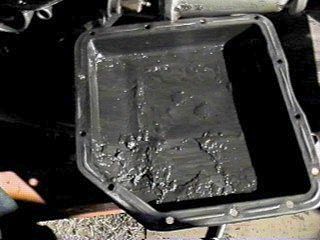
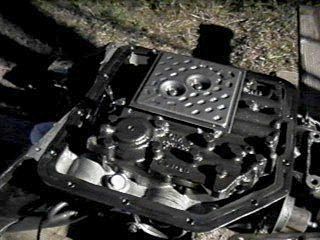
The valve body looked good though.. (ror32-4.jpg)
Back on the
slimey mud, I scraped it all together into the center of the pan and collected
it into one of my specimen containers.
(ror32-5.jpg)
I was a
little discouraged by the sight of the slime since the transmission doesn’t
have that many miles since a premium rebuild by Tracy about 15 years ago when
it lived in the white truck..
Probably 20k in the truck and another 20k of hard miles in
Rustpuppy. Does it seem like
too much crap? Larry? Class?
Bueller? Am I being faced
with another rebuild?
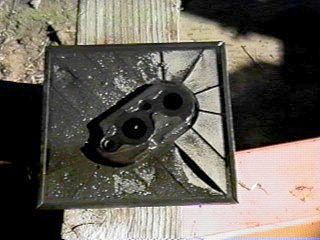
To make
matters worse after I cleaned up the pan (ror32-6.jpg) I pulled the
filter. The damn thing had two
broken sections in it where the screen was pulled away from the plastic making
the filter almost useless...
(ror32-7.jpg)
What a
revoltin development this is turning into. It seems like everything I have (except Goody) is just junk..
Rick
Draganowski
(it is
always something..)
END OF
CHAPTER 4
![[ Back Button ]](../gif/t_back.gif)
![[ Go Home Button ]](../gif/t_home.gif)
![[ Next Button ]](../gif/t_next.gif)