Subject: Return
of Rustpuppy report 41
Date: Thursday,
August 17, 2000 9:06 PM
Not a
lot of Nova work but plenty of “real” work done today. I had an important meeting in town and
also managed to pick up two sheets of ½” plywood for the much needed stable
floor for the Goody installation.
It is the damndest thing though.
Modern 21st Century ½” plywood is 15/32” thick.. Is everything going to hell? (I am an old lumberyard employee from
back in 1960-61...)
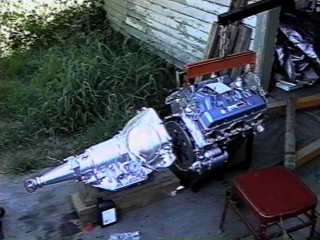
On the
Nova front I managed to put the TCI Breakaway torque converter on and have all
in preparation for the tranny/motor mating tomorrow.. Tom’s advice about the two thunks was the ticket and the
second one was difficult to find.
I almost pushed the tranny off the stack of boards onto my foot.. But both of the thunks eventually
showed up.
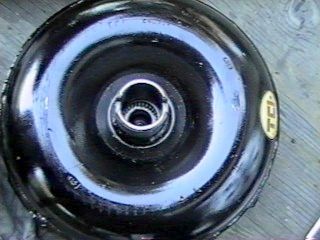
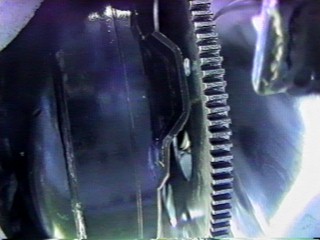
Ror41-1.jpg
and ror41.2.jpg shows the male and female parts of the operation. (can’t help thinking about sex for some
reason)
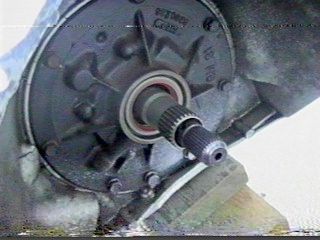
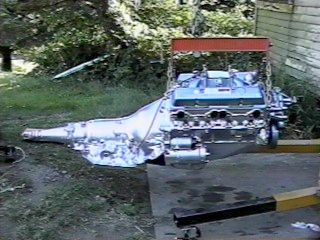
I
measured the distance from the bellhousing mating surface of the block and the
torque converter mounting pads and came up with 15/16” which gave me a ball
park target to shoot for with the mounting. (sex again!)
(see ror 41-3.jpg..)
Ror 41-4
shows the torque converter happy and snuggled in properly with a distance from
the mounting ears to the bellhousing plane of 1 1/16”. This puts a 1/8” gap between the
converter and the flexplate after the tranny is mated to the motor.. (more sex?
Draganowski, you are a dirty old man..)
More to
come..
Rick
Draganowski
(measuring
is good)
Date: Sunday,
August 20, 2000 8:00 PM
Today
was the docking maneuver day.
(gonna try not to use any sex terms) I got Goody on the hoist and close to the tranny and then
wrestled the guidepins and converter pilot into place manually by moving the
transmission. (ror42-1.jpg is the
starting point)
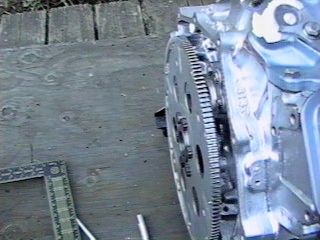
The
converter could spin freely and was about 1/8” from the flexplate bolt pads
after the six transmission mounting bolts were tightened. (ror42-2.jpg)
I put in the neat ARP 12 point converter bolts and torqued
them to about 45 lb ft. The
standard bolts are supposed to be torqued to 30 lb ft but I figured the ARP
high zoot jobs could handle 45 easy..
GM says to tighten the bolt which goes into the radially slotted hole on
the flexplate first or you get an Aren style vibration. Then the other two which have the slots
in the tangental planes..
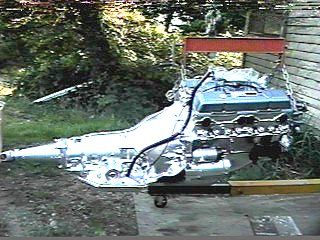
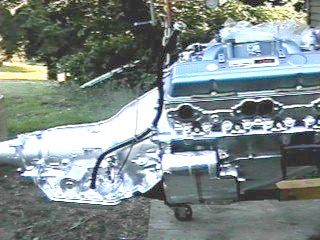
Ror
42-3.jpg shows Goody at working height all together (including the nasty black
tin flywheel cover thingie) and getting close to installation.

Ror 42-4
shows Goody sneaking up on Rustpuppy at a stealthy level..
More to
come..
Rick
Draganowski
(It won’t be
long now..)
Subject: Return of Rustpuppy report 43
Date: Monday,
August 21, 2000 8:29 PM
The
opening picture is taken from under my “Shade Tree” which provides shade and
the name of my auto shop..
You can see Goody eagerly waiting and Rustpuppy looking helpless..
(ror43-1.jpg)

A quick
note on the Junkyard Dawg. When
Dave was working on Patches I had him spend an hour cleaning up all of the
surface rust dings and scrapes on the Dawg and primer and paint them. Since he was using blue, blue it
was.. ((ror43-2.jpg)

Details
need attending to prior to installing Goody so today was a detail day. I had the hole left when I pulled out
the heater/airconditioner from Rustpuppy plugged with aluminum flashing and
aluminum tape. Hardly an elegant
solution. I wanted to keep access
to the hole in the firewall as it makes torqueing the rear header bolt on that
side much easier.
First
thing was looking for the piece of aluminum (1/8” x 8” x10 ½” ) I had cut for the
firewall door about 2 years ago.
After wasting about 45 fruitless minutes I spent the next 25 minutes
making a new one. (bet the old one
shows up tomorrow.. bah!)
Then the hole in the middle and the piece of 2x2 for a
toggle and a stainless bolt, washer, and nut and the door was done. I put a double layer of dense
foam weatherstripping around the hole and the door was on in a jiffy.. (would have been a lot easier with a
helper..) (ror43-3.jpg,
ror43-4.jpg, ror43-5.jpg and ror43-6.jpg)

Now on
to the ProMatic installation..
More to
come..
Rick
Draganowski
Date: Monday,
August 21, 2000 9:30 PM
It is
Pro-matic all the way with this report.
I wanted to get the initial messing about with the tranny done prior to
installation.
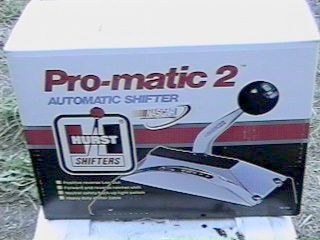
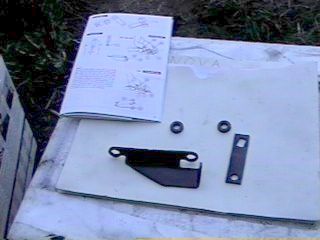
Ror44-1.jpg
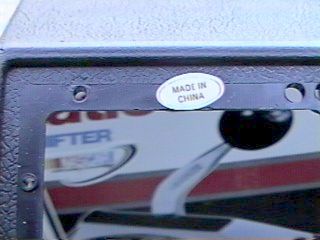
shows the neat box the Pro-matic shifter came in. The first jarring note was the sticker on the plastic
console thingie.. (ror44-2.jpg) I
wonder what the out-of-work moldmakers and machinists in this country are doing
these days..
Then I
was amazed by the motly collection of bracketry and widgets in the kit. It seems Hurst is trying to be all
things to all people..
(ror44-3.jpg) You
know I resent having to pay for all that junk just to get what I need. (what I need is in ror44-4.jpg)
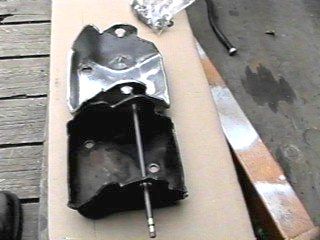
The next
thing I noticed is that the steel plate the TH350 shift arm is made from is too
damn thin. As a result the nut
securing the arm bottoms on the shaft and the arm wobbles and flops too much
for precision shifting. I
added a ½” ID washer and a 3/8” washer to properly clamp the arm so it does not
wobble. This is not a good
sign. I thought that Hurst knew
how to make these things..
Sigh.. The cable
bracket needed the spacers to line up with the arm properly and the extra long
bolts they provide are ¼” too short..
Details, details..
(ror44-5.jpg)
More to
come..
Rick
Draganowski
(picky old
engineer)
Date: Tuesday,
August 22, 2000 8:46 PM
Today’s
hour or so was spent on the second phase of the Pro-matic installation. First I
figured where I wanted the thing to be.
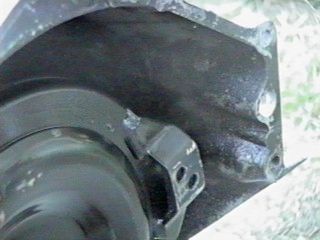
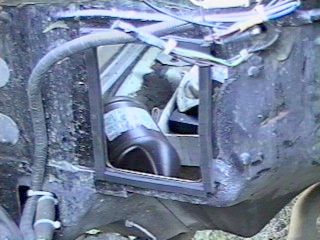
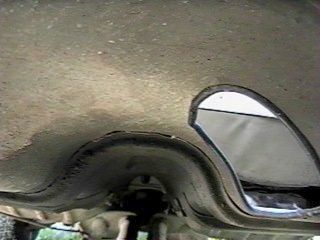
Then I felt around through the hole and encountered the spot welded in
reinforcing channel right were the rear bolts go.. It is always something.. (ror45-1.jpg...
note the tranny eye’s view of “The Hole”)
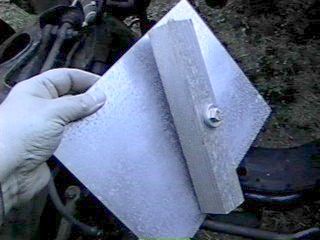
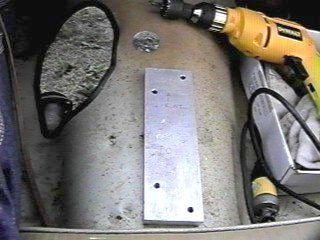
It says
in the instructions that you_MUST_ mount the shifter on a flat surface and if
you bend the mounting ears down it voids the warrantee and causes the shifter
to foul up and jam. Since I am a
tall dude I decided to use a custom made 5/8” thick aluminum spacer. (7075T6 aged 20 years and harder than
mild steel) (note drilled and
ready spacer ror45-2,jpg and 1 ½” hole for cable) That surface will stay flat..
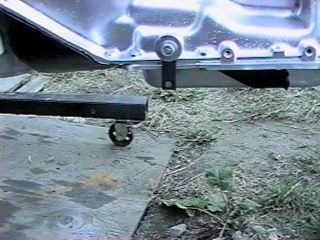
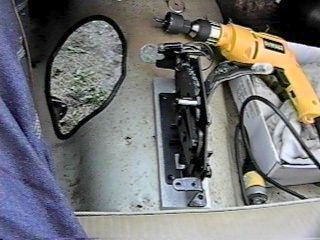
Then the
shifter in place and the 4 bolts wrestled in. It was pretty neat since “The Hole” allowed me to put the
bolts in from inside Rustpuppy with a moderate amount of contortions and
groveling.. (ror45-3.jpg)
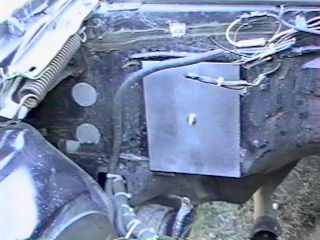
The last
picture (ror45-4.jpg) shows the shifter bolted in snug and ready to go..
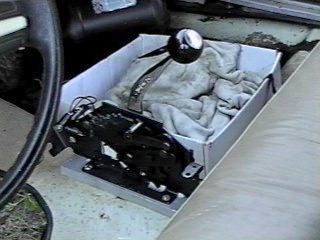
Then I
sat in the motorless Rustpuppy and played with the shifter. (like a little kid)
More to
come..
Rick
Draganowski
(Goody will
be home very soon..)
Subject: Return of Rustpuppy report 46
Date: Wednesday,
August 23, 2000 7:52 PM
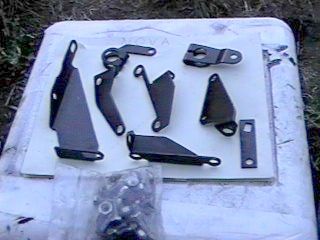
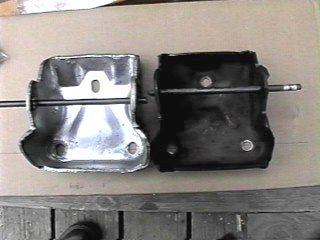
Serious
and important work interfered with Nova work today but I did get just a little
in. The most excellent Ben
Meissner (Ourstanding Artist and Designer) took pity on my tale of woe relating
to using *&^%#%^#*& truck motor mount brackets on Rustpuppy and sent me
a pair off of his 74 parts Nova.
They arrived today and I only had time to get them and the tranny
dipstick tube cleaned up and painted.
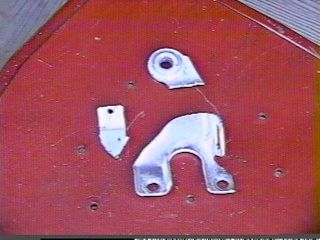
Ror46-1.jpg
and ror46-2.jpg show the small but important difference between them. Also the truck bracket is thicker
metal.. I went crazy trying
to make the wrong ones work and am glad to never have to face that again.. (at least until the Dawg goes back
together..)
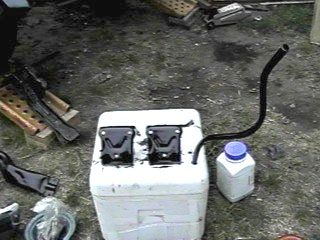
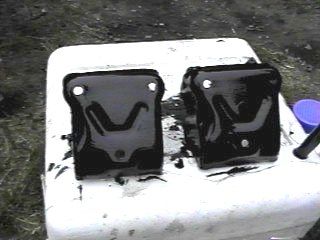
Ror46-3.jpg
shows the painted brackets and tranny tube and ror46-4.jpg just the new (to me)
brackets.
You will
notice the tab which bolts to the bellhousing is missing on the tube. I just clamp it in place with a hose
clamp.
I
shortened the truck tube about 4 inches to fit it under Rustpuppy’s hood and
hope I got the length of the dipstick right. From the bottom of the rolled bead which seats on the top of
the transmission casting to the end of the dipstick when it is fully in is 2
7/16”. Does that sound about right?
More to
come...
Rick
Draganowski
Subject: Return of Rustpuppy report 47
Date: Thursday,
August 24, 2000 8:22 PM
Painfully
slow progress but some tiny progress today. After an urgent trip to town wasted most of my Nova time
waiting in line and listening to Aerosmith at a stupid road construction mess..
While in
town I picked up a replacement O-ring for the tranny dipstick tube. (after 23 years they lose some of their
ringiness..) So all I had
time for was getting the custom 2 piece tube in with it’s custom hose clamp and
custom RTV at the pulled out spotweld holes..
Then I
addressed the motor mount brackets.
I checked first for the depth of the threaded holes in the block and
found a couple that could not accept a 1” bolt with two washers and the
bracket.. So I rounded up a
half dozen ¾” bolts. I had
problems in the past with the skinny pasty Goodwrench boys not tightening these
bolts enough so I gave them about 38-40 lb ft..
And that
is where she sits tonight.
Just moments away from actual installation..
I just need
one unbooked afternoon and evening..
Rick
Draganowski
(just four
crummy little hours..)
Subject: Return of Rustpuppy report 48
Date: Friday,
August 25, 2000 9:02 PM
A Nova
work window about 2 ½ hours long opened up today. My first instinct was to go like crazy and just get Goody
installed and worry about the
details later. After a few
minutes of feverish preparation reason intervened.
My
training was to never let emotional bias interfere with technical
decisions.. And here I was rushing
off in an emotional frenzy..
After leaving the scene to think, I realized that now with Goody on the
hoist at a comfortable working height is the best time to attend to as many of
the little details of motor installation as I could. This would avoid the nasty crawling under the car with dirt
in my eyes business as much as possible..
So that
is where the 2 ½ hours went today.
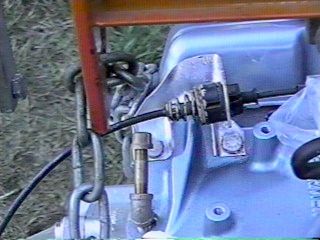
First thing was modifying and installing the detent cable bracket. Those
stupid and no longer used ears had been bothering me for 5 years. I even put the recommended Tyrap on the
detent cable where it crosses the dipstick tube to keep it constrained. (ror48-1.jpg and ror48-2.jpg)
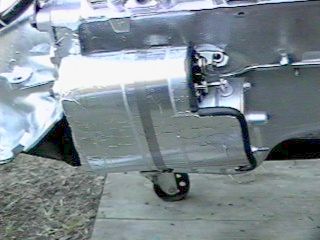
Then it
was press on to putting on the finishing touches and installing the starter
heat shield I designed and made last summer. I used a 100% stainless 6 ½” hose clamp. The shield itself is made from two
layers of aluminum flashing with 4 layers of extra heavy duty aluminum coated
Kraft paper inside. It is trimmed
with slit and RTV’ed on vacuum hose to protect the wiring. (ror48-3.jpg and ror48-4.jpg)
Then the
balance of daylight was spent on rehabilitating the steel tranny cooler lines
and the transmission modulator line. Steel wool and brush on black acrylic enamel for the
cooler lines and the neat silver NAPA Commercial paint (as used on Goody and
the tranny) for the modulator line..
More to
come... for sure...
Rick
Draganowski
(the
only time I know of that NASA forced a launch for political and emotional reasons was the Challenger.. Something we never would have done back
in the days of Apollo... how times
change, sigh...)
END OF
CHAPTER 6
![[ Back Button ]](../gif/t_back.gif)
![[ Go Home Button ]](../gif/t_home.gif)
![[ Next Button ]](../gif/t_next.gif)