Subject: Return of Rustpuppy report 49
Date: Saturday,
August 26, 2000 9:59 PM
A four
hour Nova time window opened up today.
The weather was great, my physical problems at a minimum, and eight
months of impatience driving me..
A good day..
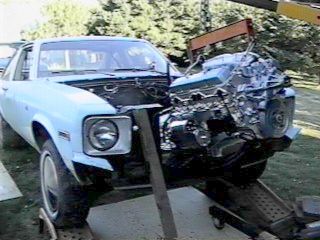
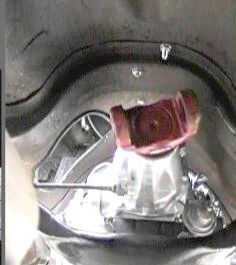
The
first picture shows Goody picked up about 10” higher than needed to test the
capabilities of the medium short settings on the hoist. (ror49-1.jpg)
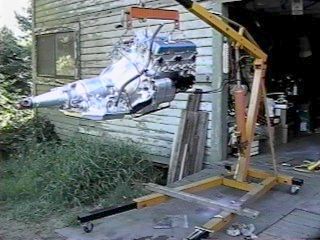
Rustpuppy
waiting anxiously at the end of the plywood runway...
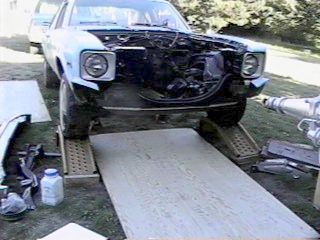
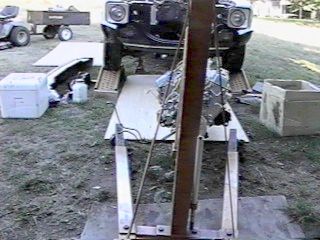
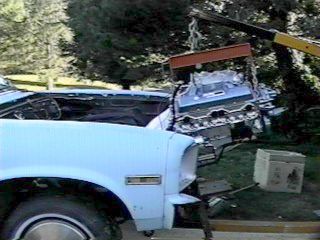
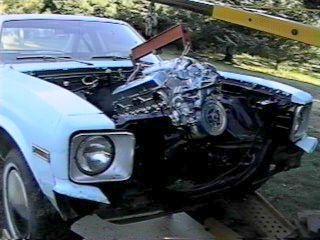
The next
seven pictures show the painfully slow process of getting Goody into position
to drop onto the motor mounts.. (ror49-3.jpg through ror49-9.jpg) Due to the rough ground and uneven
grade it took about 3 hours of my work window to horse the hoist along about an
inch at a time by prying with a 2x3...
But I was patient and careful and it worked out.. I had to add another
sheet of plywood to get the runway long enough.. More groveling on the ground and pounding nails under
Rustpuppy to secure the two sheets together..
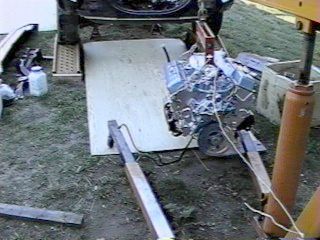

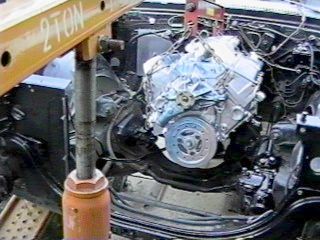
Finally
right at the fall of night and the end of an exhausting but exhilarating day. Am I tired!
GOODY
WAS HOME! (See ror49-10.jpg)
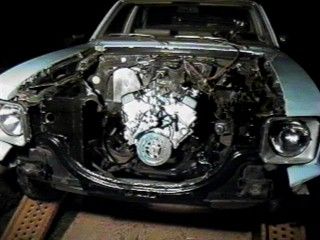
The
proper motor mount brackets from Ben Meissner worked perfectly and the through
bolts slid (with the aid of a little hammer) right into place..
It took
a little pulling and jerking and wrestling with Goody to get her to drop into
place but It seems to always require some physical strength to get things
together..
More to
come...
It won’t
be long now..
Rick Draganowski
Subject: Return of Rustpuppy report 50
Date: Sunday,
August 27, 2000 9:17 PM
A bit of
a low impact day today due to physical challenges caused by overextending myself
yesterday but important progress was made.
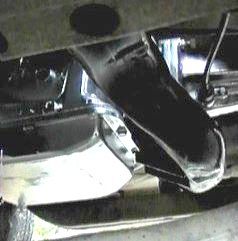
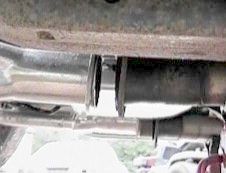
First
thing was the under Nova groveling related to getting the tubular crossmember
and transmission mount installed.
Taking my time and doing most from a comfortable laying down position it
went in slick an pretty. (see
ror50-1.jpg) I even got the
speedometer cable installed and had a few thoughts of getting the driveshaft
in.. (Naaa... tomorrow mebbe)
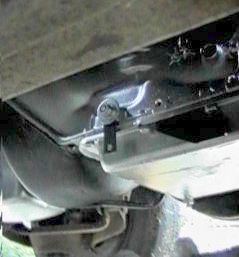
Things
look much better down here and now I am ready to finish the installation of the
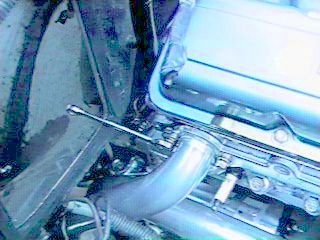
Pro-matic shifter cable and stuff..
(ror50-2.jpg) It is a shame
I had to mar the pretty silver paint by jacking under the tranny pan.. Oh, well. Dings and scuffs happen when we move heavy stuff around..
I also
(before I could forget and have Goody fall out on the road) put the nuts on the
motormount through bolts and torqued them down.
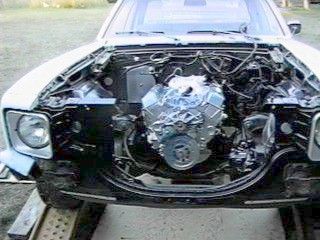
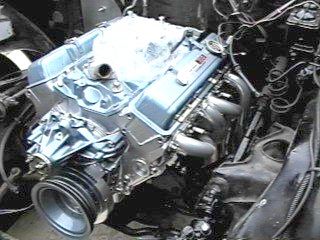
Finally
there is a smiling picture of Rustpuppy showing off Goody in the
daylight.. (ror50-3.jpg)
More to
come..
Rick
Draganowski
(snapping,
popping, creaking, and groaning..
but having fun!)
Date: Monday,
August 28, 2000 9:13 PM
Spent sitting
time cleaning up the rusty driveshaft and painting it black and getting the
crankshaft pulley looking decent.
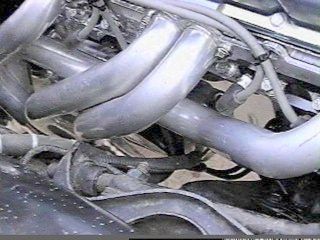
The
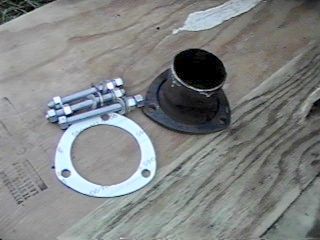
biggest task was getting the passengers side header in.. It was a bit of a hassle with the
starter on the motor but it
threaded up from the bottom.. This
is the one that really don’t match the Flowtech collector location.
Ror51-1.jpg
shows graphically why I wanted to have “The Door” instead of closing the
firewall hole permanently..
Makes the last header bolt easy instead of a PITA..
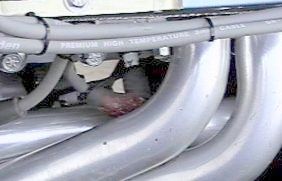
Ror51-2.jpg
shows the header in place torqued down with the plugs installed.. Nice..
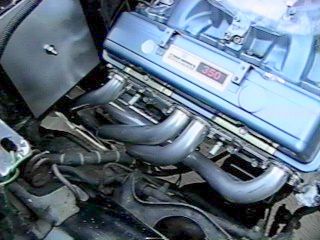
Ror51-3.jpg
shows just how much the exhaust pipe comes up short.. The Stainless 409 alloy adaptor looks rusty but it is
just discoloration and would polish up like a mirror.. (Not me!) The rest of the exhaust back to the Super Turbos is 304
alloy and does not polish well but does not discolor like the 409 alloy. I really wish that it fit.. Sigh..
More to
come..
Rick
Draganowski
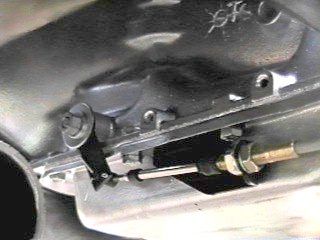
Subject: Return of Rustpuppy report 52
Date: Tuesday,
August 29, 2000 7:44 PM
I have
been noticing that the motor is offset slightly toward the passengers
side. More in the rear than in the
front.. I wonder if that was to
get the driveshaft aligned better or to balance the weight of the driver.. Hmmm... See ror52-1.jpg and ror52-2.jpg.
I was
itching to see if the driver’s side header would line up. The differences looked minor with the
headers off. But a few minutes
work with the special little 3/8” wrench for them neat stainless ARP header
bolts and I jumped under to see..
Nope.. Not as far off as
the passengers side but way off..
Oh, well..
(ror52-3.jpg and ror52-4.jpg)
I figured
a way of making a semipermanent hookup between the existing pipes and the
header collectors while doing chores and thinking last night. By using the cheapy 2 ½ collector
adaptors provided with the Dynomax headers.. Here is how. I
will cut the adaptors length down so they snugly fit into the bell of the
existing adaptors and bolt them to the headers with threaded rod. Then I draw the existing pipes tightly
against the stubs sealing pretty good..
That would last for quite a while till I can get my exhaust guy to make
a proper fix..
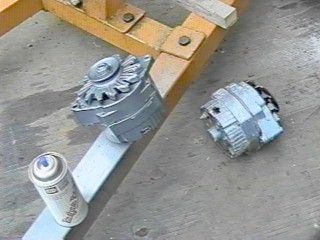
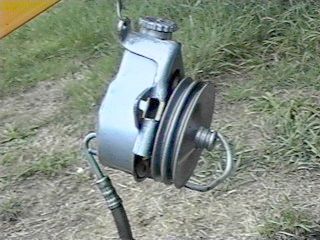
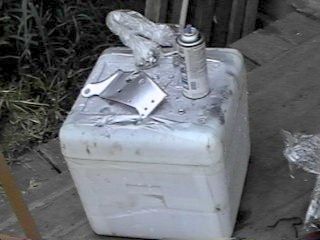
Then I
spend a little while cleaning up an painting the alternator and power steering
pump and brackets..
(ror52-5.jpg,
ror52-6,jpg, and ror52-7.jpg)
I have a
lot of important work to do so the Nova time ended early today..
More to
come..
Rick
Draganowski
(fog came in
and it is dank!)
Subject: Return of Rustpuppy report 53
Date: Thursday,
August 31, 2000 8:26 PM
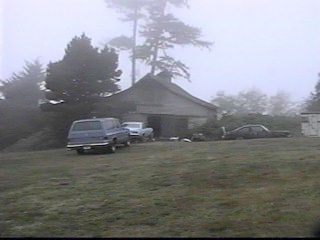
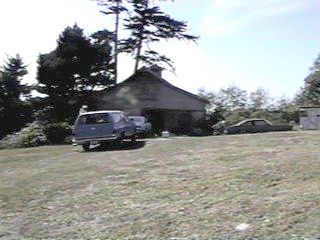
We had a
cold front yesterday and the nasty wet misting fog at 57 degrees is here.. Ror53-1.jpg shows the view as I went
out for some Nova work today..
Brrr.. I am
physically challenged by this kind of weather change so I did not expect to get
much done today..
Anyway,
all that was accomplished was the installation of the cable for the Pro-matic
shifter. Right off the bat I had
nothing but trouble. I had
carefully cut the 1 ½” hole exactly as the instructions. But I did not think that moving the
shifter up 5/8” of an inch with the flat spacer would call for the hole being
somewhere else.. Duhh.. My trusty manual sheet metal nibbler
made short work of extending the hole to where it was really needed.. Slower than the air powered
one but a lot more accurate..
Ror53-2.jpg shows the shifter in first gear (where the initial
adjustment was made) and the extended hole..
(Note
the nice silver transmission showing through “The Hole” like a misplaced piece
of the Starship Enterprise hidden behind a hatch on the Mining Ship Nostromo..)
The
underside picture shows the cable hooked up to the shift arm. I manually put the transmission in
first and then adjusted the mounting nuts and pivot pin to where it would just
drop into the hole in the shift arm.
(ror53-3.jpg)
The last
picture, ror53-4.jpg shows a little of the cable routing. It doesn’t seem to come anywhere near
the headers.. Good..
Then I
sat in Rustpuppy and played with the shifter.. I notice that the 1-2 shift detent and the N-R shift detent
did not feel as crisp as the others..
To test the accuracy of the detent mechanism in the shifter versus the
detent mechanism in the transmission I did the following. First I removed the cotter key at the
pin where the cable attaches in the shifter. Then shifting through all the gears I pulled the cable off
the pin and tried to slip it back on..
The results are as follows.
1st-
lines up perfectly - (this is
where the adjustment was made) 2nd- shifter 0.008” to 0.010 short of
lining up.. (felt mushy when
shifting to second)
D- lines
up perfectly
R-
shifter 0.005” to 0.008” short of lining up.. (nother mushy detent)
P- lines
up..
It seems
that there is some inaccuracy in the design or perhaps wear in the tranny
detent..
I
probably will work just fine but it just feels off to me..
Rick Draganowski
(picky old
engineer)
Date: Friday,
September 01, 2000 8:57 PM
The cold
drippy fog lifted today but I had important meetings in town so I only got a
few minutes of Nova time..
I mentioned earlier that the “Dueling Detents” problem I am having with
the Pro-matic ratchet shifter could probably be fixed by inserting a bit of
“mechanical latency” into the system.. (slop or play to you)
So the
first thing was to slide under Rustpuppy and take out the clever fix I had
worked out for the wobbly shift arm “perceived problem”.
Then
back in the cockpit I tested all functions on the shifter.. It passed with flying colors.. Every detent was crisp and the cable
could be pulled off and replaced on the pin in all positions with no problems
as now each detent is free to do it’s job.. Happy ending..
There
was still a bit of time before dark so I addressed the driveshaft
replacement.. It went on in a
jiffy and looks much better with its coat of shiny black paint..
More to
come this fine weekend..
Happy
Labor Day..
Rick
Draganowski
(laboring on
the Nova!)
Subject: Return of Rustpuppy report 54a
Date: Sunday,
September 03, 2000 9:37 PM
A new
day and the cold rain and fog just a memory. (ror54-1.jpg)
I decided to
press on with getting the headers flanged up to the too short exhaust
pipes. After careful measurements
I came to the conclusion that both sides were exactly 1 ½” short of hooking
up. So my plan of using the
cheapy collector adaptors as spigots fitting into the collector adaptors on the
pipes came into play.. The overall
length of the adaptors was 3 inches and the taper of the stainless collectors
used up exactly one inch. So ½”
had to be trimmed from the adaptors..
The only way of getting a clean straight cut which would seal was to
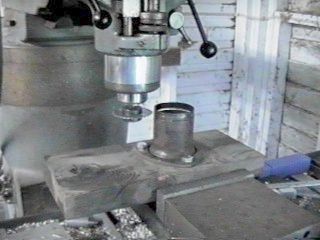
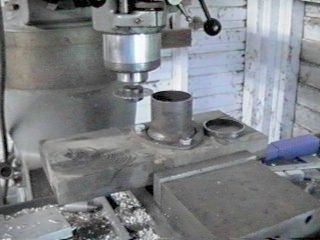
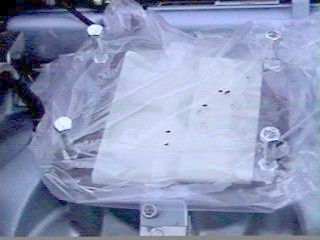
flange up a mounting jig and use the Bridgeport with a slitting saw.. (ror54-2.jpg, ror54-3.jpg and ror54-4.jpg)
Right at
this point we had a power failure for the whole local area.. So Nova work stopped dead. I set up the generator and ran the
power cable the 150 feet to hook up to Deloris special environmental trailer.. That was a tussle and took a lot of the
starch out of me.. Anyway the
power company got the problem fixed in about an hour or so things could go back
to normal.. I just sat and
did some painting while the power was out..
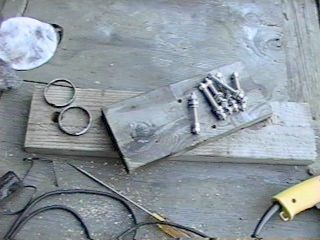
Then I
cut up some 3/8” NC threaded rod for the fasteners which will make it
work.. (Ror54-5.jpg)
I was pooped and it was getting damp and dark but I
managed to get the passengers side hooked up to prove the principle.. Looks almost permanent, don’t it? (ror54-6.jpg)
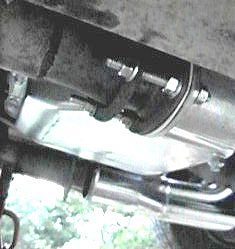
And
first thing tomorrow I will get the drivers side in (ror54-7.jpg) and then get
back on installing the accessories for Goody.. It is getting closer to seat time!
More to
come..
Rick
Draganowski
Subject: Return of Rustpuppy report 55
Date: Saturday,
September 02, 2000 8:11 PM
Since it
is a holiday weekend the weather turned dead against me. Cold rain (57 degrees) wind, lightning
and thunder.. Nice..
Nova
work went on between the showers of cold rain. I got the fuel pump in and found with the front bumper off
and the radiator support bar and radiator gone it is almost a pleasure. You can just reach in and do
it.. Having the motor at TDC of #1
compression stroke helps here too..
Then
just before the next deluge started I installed the modified Proform
distributor I am using in Goody. I
was careful to return Goody to TDC on the #1 compression stroke after messing
about with torque converter bolts so the distributor just fell exactly into
place..
Then I
had to put the tarp back over Goody as the cold rains continue..
Tomorrow
is another day..
More to
come..
Rick
Draganowski
Subject: Return of Rustpuppy report 55a
Date: Monday,
September 04, 2000 8:54 PM
Laboring
on Labor day but the vast majority of it had nothing to do with Nova
work.. Anyway I got the missing
coupling flangeup onto the exhaust making it ready to rock and roll..
Then
uncovering Goody which had been lurking under a silver tarp for a few days I
found something nasty but perhaps fitting.. The damn mice had been under the tarp looking for a home and
pooped all over the top of Goody..
Those little black thingies are mouse turds.. (ror55-1,jpg)
Then I
managed to get the spark plug wiring harness with neat clear distributor cap
(so you can see sparks and stuff turning in there) into place.. (ror55-2.jpg)
I am
still a little worried about old number six spark plug boot as there is a scant
1/8” clearance between the boot and the header no matter how the wiring is
run.. I hope that it will be
enough but doubt that the high temp red RTV will last and I need to get a
replacement boot for that plugwire.. We will see..
Then
Goody’s dipstick went into place..
I am thinking of pulling the tube out a little and putting a touch of
RTV on it to keep it from leaking..
If I remember..
Last
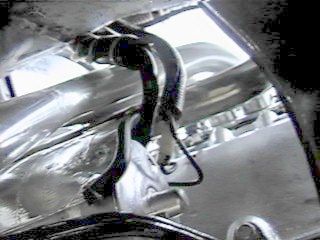
detail for today was fastening the motor ground wire onto one of the head
accessory holes by the firewall with a stainless steel bolt..
I spent
a few minutes sitting in Rustpuppy looking at the dash and trying to figure out
where and how to mount the instruments
(big gauges and a 120 mph speedo)
It was seat time after a fashion as I could sense that the real thing
was getting close.. I
got a feeling the dash pad mounting hardware is all under the dash somewhere
and probably will not take it off since I am not going to crawl my fat old body
on the floor trying to get under there..
Can it be taken off without the crawling around part? Distructively is OK..
More to
come..
Rick
Draganowski
(soon now..)
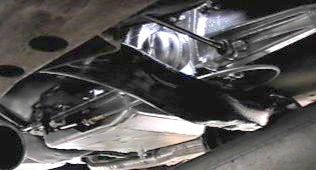
Subject: Return of Rustpuppy report 56
Date: Tuesday,
September 05, 2000 9:25 PM
Got a
two hour window for Nova work today but it was late and half of it had to be
after dark with a droplight stuff..
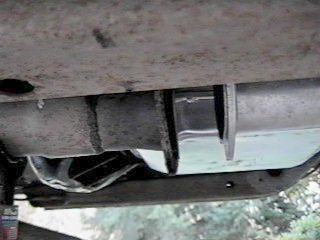
First off I got a decent picture of the exhaust “Probe and Drogue”
docking system (stolen from NASA) with both pipes hooked up.. (ror56-1.jpg)

Rustpuppy
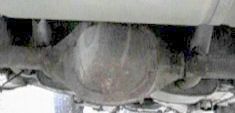
has a one legged 3.08 ratio 7 ½ inch ring gear differential.. (Scott assures me
that the 7.625 job never got into a Nova..) The most excellent Ray Buck assures me that the little
guy is strong enought for moderate street fooling around. (no slicks or
positraction)
Has any
one else got a good word about this spindly looking rear end? The Junkyard Dawg will probably
end up with the 7.5” rear end out of Yakima Sue so it looks like there is not
going to be a 8.5” ten bolt in my future.. If I do need one some day what do they cost in an “honest”
junkyard? (ror56-2.jpg)
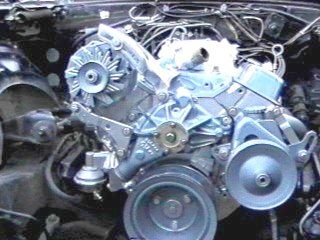
Then I
concentrated on getting the power steering pump and hoses back on and hooked
up. By the time I got to the
hose fittings it was dark and I had a hell of a time getting the fittings to
screw properly into the steering unit..
But after much fumbling around, spilling of fluid, and trying different
angles they came together.. (even
torqued them properly with a tubing wrench.. ) (ror56-3.jpg)
More to
come..
Rick
Draganowski
(getting
closer.. every day... closer..)
Subject: Return of Rustpuppy report 57
Date: Wednesday,
September 06, 2000 9:45 PM
Pressing
on with the installation of accessories on Goody to get on the road ASAP.. I started with some
last minute painting.. Got a heavy
coat of flat black spray paint on the new 2-core radiator Rustpuppy will be
using and painted the motor side of the fan.. (leaving the other side black as you cannot see it much..)
Then I
crawled under and checked and tightened the header flangeup studs and put a gob
of high temp RTV on each of the 18 nuts in the assemblies to keep them from
vibrating loose..
Then I
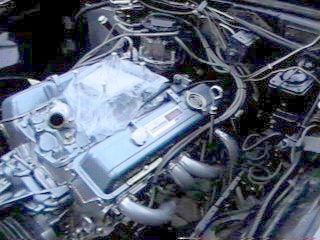
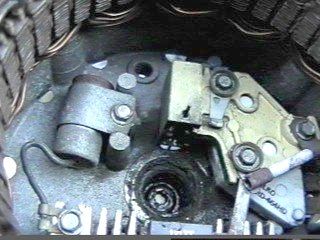
progressed to getting the alternator brackets and alternator on.. I am using the alternator off of
Rustpuppy’s original 250 six as the ball bearing in the truck alternator is
starting to sound gritty..
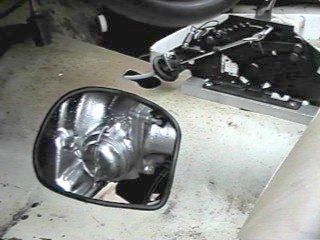
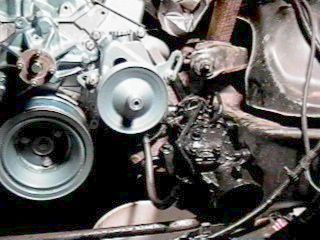
Ror57-3.jpg
shows the nice truck brackets and 10SI alternator in place..
Then going around the other side I find that the damn six
alternator is assembled with the connector and terminal 180 degrees away from
the v8 job.. (ror57-4.jpg) So just when I thought I was
getting somewhere I have to fix something..

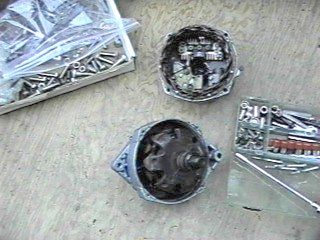
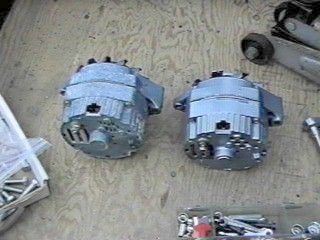
Then I
tore the alternator apart and readied it for assembly in the right way.. Ror57-5.jpg shows the explosion and
ror57-6.jpg and ror57-7.jpg show a 0.050 Allen wrench holding the brushes in
place to allow assembly.. Then
after adding a blob of grease in the roller bearing it was together matching
the old truck v8 alternator..
(ror57-8.jpg)
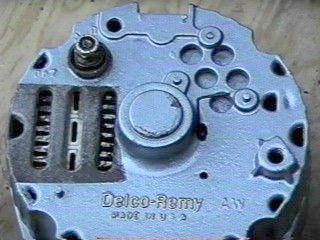
Then it
was deja vu with the alternator back in place.. (ror57-9.jpg)
But with a big difference..
It ain’t upside down in the back now.. (ror57-10.jpg)

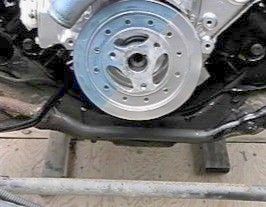
I got
the rear end of Rustpuppy off the jack stands and back with her tires on the
ground getting ready to get the ramps out tomorrow.. (ror57-11.jpg)
I
realized when I encountered the alternator assembly problem that I was beginning
to stress myself out with impatience and stopped everything and just sat and
looked at Goody for a while.. Due
to my health problems it is important to keep stress down to an absolute
minimum.. So I took my
time getting things in order and started enjoying the work again.. Whenever Rustpuppy runs will be soon
enough..
Tomorrow
is another day..
More to
come..
Rick
Draganowski
Subject: Return of Rustpuppy report 58
Date: Thursday,
September 07, 2000 9:09 PM
Pressing
on in a calm quiet way, before I took Rustpuppy off of the jackstands and
ramps, I just sat and stared at her and thought. Then it came to me..
The starter wiring was not hooked up yet! So it was crawl back under and try to figure a way to do it..
There is
only room for one hand in the area and it is impossible to see what is going on
so it took quite a bit of fumbling around to get the wires on and the nuts in
place. Then it was a challenge to
tighten the nuts.. After what
seemed like days under there it all came together.. In ror58-1.jpg you can see the starter lurking under them
headers somewhere..
Ror58-2.jpg shows where old number six boot is getting
toasted.. I have it flanged in
with a Tyrap and plenty of high temp RTV.. But I really need to get a skinny boot for this
position..
Back to
the starter wiring, ror58-3.jpg is an underneath shot showing how the terminals
are not visible.. Lots of
scratching around to get it together..
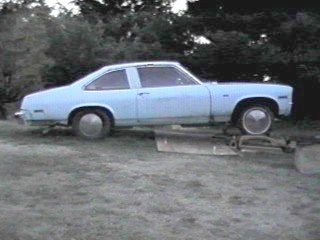
After
that fun job was over I horsed around and got Rustpuppy off of the jackstands
and back on her wheels..
Yipee! A big step is made
toward seat time!
Notice
without the front bumper, hood, radiator, and other odds and ends ol’ Rustpuppy
is way nose high.. She normally
sits a little high in the front (because the stock rear springs are sagging
about an inch or so.) but this looks strange.. By the way, that strange smear on the door
there is moss and algae growing on the north side of poor Rustpuppy.. Mebbe even some small lichens
too.. Sigh.. It has been a long time..
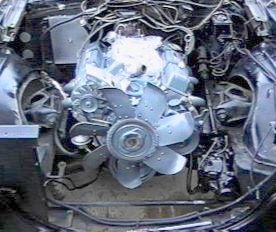
Then
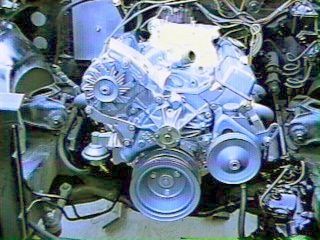
with Rustpuppy at a comfortable working height I got the belts on and adjusted
and the fan on. It is a big 7
blade truck fan with a thermostatic clutch.. (ror58-5.jpg)
More to
come..
Rick
Draganowski
END OF
CHAPTER 7
![[ Back Button ]](../gif/t_back.gif)
![[ Go Home Button ]](../gif/t_home.gif)
![[ Next Button ]](../gif/t_next.gif)